When it comes to software development, it is more than important to know how the actual software will look, way before the actual development starts. This is a critical activity, as it serves as a guideline for all the stakeholders in the software project.
Traditionally, paragraphs of text have been used to describe or elicit the software requirement. However, when it comes to comprehension of these texts, every individual will have their own way of visualizing the requirement. This leads to a mix-up in the software development teams and the ultimate cost is in terms of wasted efforts, money and time.
Wireframing can be defined as an activity to visualize the layout of a given screen (mobile or web). In the recent years, there has been an increasing demand on Wireframing the screens/pages in order to gauge its acceptability.
Why Wireframing?
Wireframing is required in order to save on time invested in understanding a software requirement. As they say, a picture is worth more than a thousand words, Wireframing provides a glimpse at the requirement of any feature/page by effectively visualizing the screen layout and elements. In the end, it also helps the development teams to be oriented towards the common end goal.
The owner of the Wireframing activity is usually a Business Analyst / User Interface Designer / Interaction Designer. This team member is required to collaborate with the team before, after and during the Wireframing process.
Balsamiq as a Wireframing Tool
For a professional assigned with a Wireframing activity, it makes sense to save time by using a tool. One of the most effective tools to do Wireframing is to use a simple pen and pencil! This requires no investment at all! However, when it comes to communicating it to the teams, we need a look-and-feel similar to a pen and pencil, but with added features such as sharing over email or similar mediums.
Balsamiq serves as an excellent tool, fulfilling all the requirements of Wireframing, collaboration and creativity. Its unique set of features enables the team member to do rapid Wireframing, get a consensus on the feature to be developed. This will eventually have the team aligned with functionality in terms of the layouts.
It also enables collaboration over different teams, so that a team member can collaborate with different co-located or remotely located teams. Its ability to export the wireframes in PDF/PNG formats allows for a flexibility, while sharing the wireframes with the teams.
We now know how Balsamiq is efficient for creating the wireframes on-the-fly. If we utilize this time early during the software development to set the expectations of the stakeholder, there will be a higher satisfaction among the stakeholders considering the minimal amount of time required to create the wireframe. This is the primary reason why Balsamiq is used by majority of the product organizations, where meeting customer/stakeholder relations are crucial.
For a Product Manager / UX Analyst, Balsamiq Mockups provide a platform to add value early in the development. By using its rich toolset, Product Manager / UX Analyst can drive the product seamlessly towards its success.
Balsamiq Mockups - Introduction
Installing Balsamiq
To install Balsamiq, please ensure that you have the following requirements.
For running Balsamiq on your computer, Adobe Air 2.6 needs to run. It works fine on most computers and operating systems. The minimum system requirements for Adobe Air 2.6 are given below −
For Windows
- A 2.33GHz or faster x86-compatible processor, or Intel AtomTM 1.6GHz or faster processor for netbook class devices.
- Microsoft® Windows Server 2008, Windows 7, Windows 8 Classic or Windows 10.
- A minimum 512MB of RAM (1GB recommended).
- AIR SDK Development Supports Microsoft® Windows 7 and above, 64-bit only.
For Mac
- Intel® CoreTM Duo 1.83GHz or faster processor.
- Mac OS X v10.7, and above.
- A minimum 512MB of RAM (1GB recommended).
- AIR SDK Development supports Mac OS 10.9 and above, 64bit only.
Reference link - Balsamiq System Requirements
Downloading Balsamiq
We can download Balsamiq from the following link – Balsamiq Mockups for Desktop Balsamiq is available on Windows and Mac OS.
User Interface
Once the installation goes through, we should be able to open Balsamiq from our computer. We will see the following screen for the first time when we run Balsamiq.
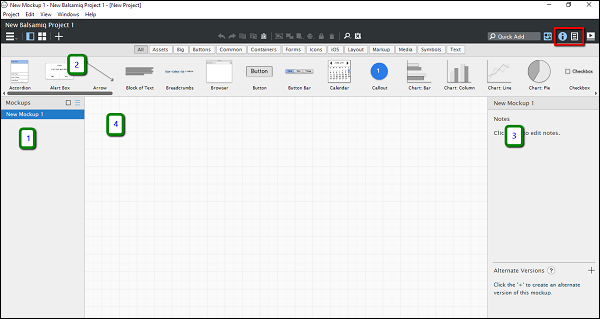
As shown in the above screenshot, the user interface for Balsamiq is divided in the four following parts.
- Navigator
- UI Library
- Inspector
- Wireframe space/Area
In the screenshot, the section highlighted in red is the toggle for the sections Inspector / Project Information. Based on the selection, we should be able to see either the Inspector / the project information section (3).
UI Library
As shown in the following screenshot, the UI Library is categorized as per different screen elements. You can scroll horizontally on “All” section and get an idea about the screen elements available in Balsamiq.

Let us get acquainted to the different basic screen elements categories available in Balsamiq.
- All − This covers all the UI elements present in Balsamiq. You can scroll horizontally to view/use them.
- Assets − For the purpose of introduction, these are the custom assets as uploaded by the user.
- Big − This category includes the screen elements, which are reasonably high in size/appearance. You can see the elements such as placeholders, browser window, iPad, iPhone in this category.
- Buttons − It includes all the button controls used in mobile/web wireframes. A typical example will be action button, checkbox, etc.
- Common − These are different shapes/controls used to denote the most common interactions.
- Containers − As the name suggests, it is inclusive of the Window, Field Set, Browsers, etc.
- Forms − All the UI controls related to a form are present in this category.
- Icons − At any given point, you might need to denote a particular operation by an icon. For instance, in the recent past, we have the floppy icon with the Save button. This category of controls will provide you with the icons required for this operation. Balsamiq has a huge collection of icons; feel free to check them!
- iOS − The UI controls, specific to Apple iOS mobile operating system, are available under this category.
- Layout − When representing a basic page/feature, it becomes important to represent the basic layout. The category layout includes most of them, such as Accordian, Horizontal/Vertical Tabs, etc.
- Markup − Suppose you want to add a comment on a particular control in the wireframe. The comment box is available in the markup. In addition, callouts are used to show interconnectivity in many of the scenarios. It is available under the Markup Category.
- Media − When it comes to showing an image/sound in our wireframe, related UI controls are available under the Media category.
- Symbols − The symbols are reusable components, which can reduce the time to create the most common elements.
- Text − As the name goes, all the UI controls related to text or paragraphs, such as Link Bar, Block of Text, Combo Box is available under this category.
In the next chapter, we will make the first project in Balsamiq.
Balsamiq Mockups - First Project
Let us create our first project in Balsamiq. Before we jump in to the Wireframing, it becomes more than important to plan the screens/page, so that our efforts are focused. We will walk through a company website as we go on creating the wireframes.
Concept: A Company Website
For the purpose of this tutorial, we will create a company website. This wireframe can relate to many small/medium scale company websites.
So what happens in the planning phase?
In the planning phase, we invest time to brainstorm what all pages will be present on the website and contents of each. Consider the following pages for the website.

In the next chapter, we will see how to use Balsamiq to design these four pages.
Balsamiq Mockups - Wireframing in Action
In this chapter, we will discuss how to use Balsamiq to design the following four pages for our website −
Balsamiq Mockups - Navigation
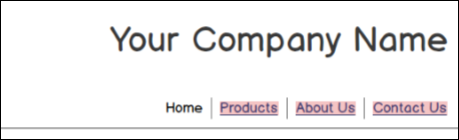
Now that we have created the pages, the critical part is making them appear in an order like a web page. In our example, the navigation is achieved using the link bar at the right top corner.
Let us see how we can connect the first page Home and the second page Products and Services.
- Go to Home page
- Click on the link bar
- Refer the properties pane

As highlighted, from the Links section, click on the drop down for Products. It will show you the list of available mockups. The options are shown below.
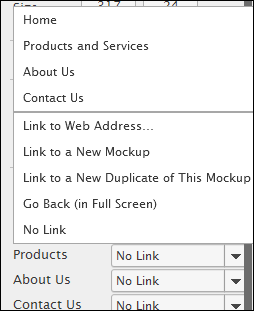
From the list, click Products and Services.
Once done for the Home Page, repeat the same procedure for other pages – About Us, Contact Us. Note that on the other pages; we will have the navigation link inserted for the pages other than the selected one.
Balsamiq Mockups - Exporting the Mockups
In this chapter, we will see how to put all the mockups of the project together and export them in PNG images or a PDF file.
If you were to show the wireframe that you created to an end user/client, you obviously would want to show this wireframe in a more common format, for example, a PDF. For this purpose, Balsamiq Mockups provides a flexibility to export the mockups in the form of PNG images or PDF file.
Let us export the mockup in PDF. To do so, click on the Project Menu, then click Export to PDF. It will show a screen as shown in screenshot below.
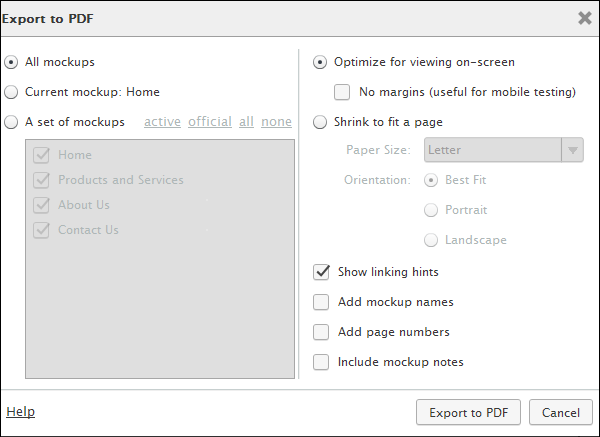
From the above screen, select the check box – “Show linking hints”. Click Export to PDF. It will show a popup asking for a location to export your PDF. Once you provide a location, the PDF will be exported to the specified location. The progress will be shown in the progress bar as shown below.
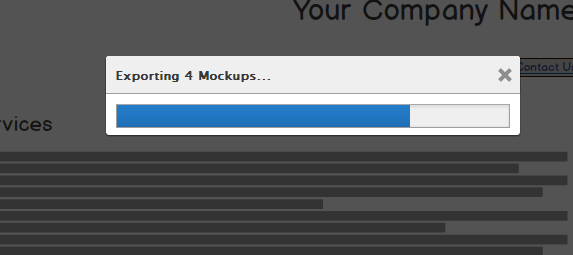
There will be a confirmation box, when the PDF is exported as shown below.
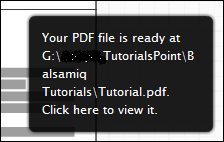
On clicking this message, you will be shown the PDF. In the PDF, you can try out the navigation on the highlighted link bar.
For best viewing and navigation experience, use Adobe Acrobat Reader.


Comments
Post a Comment