Bugzilla is an open-source tool used to track bugs and issues of a project or a software. It helps the developers and other stakeholders to keep track of outstanding problems with the product.
- It was written by Terry Weissman in TCL programming language in 1998.
- Later, Bugzilla was written in PERL and it uses the MYSQL database.
- Bugzilla can be used as a Test Management tool since it can be easily linked with other test case management tools like Quality Centre, ALM, Testlink, etc.
- Bugzilla provides a powerful, easy to use solution to configuration management and replication problems.
- It can dramatically increase the productivity and accountability of an individual by providing a documented workflow and positive feedback for good performance.
Most commercial and defect-tracking software vendors charged enormous licensing fees in the starting days of Bugzilla. As a result, Bugzilla quickly became a favorite among the open-source users, due to its genesis in the open-source browser project with Mozilla. It is now the most precious defect-tracking system against which all the others are measured.
Bugzilla puts the power in an individual’s hand to improve the value of business while providing a usable framework for natural attention to detail and knowledge store to flourish.
Bugzilla – Key Features
Bugzilla has many keys as well as advanced features, which makes it unique. Following is a list of some of Bugzilla’s most significant features −
- Bugzilla is powerful and it has advanced searching capabilities.
- Bugzilla supports user configurable email notifications whenever the bug status changes.
- Bugzilla displays the complete bug change history.
- Bugzilla provides inter bug dependency track and graphic representation.
- Bugzilla allows users to attach Bug supportive files and manage it.
- Bugzilla has integrated, product-based, granular security schema that makes it more secure.
- It has complete security audit and runs under the Perl’s taint mode.
- Bugzilla supports a robust, stable RDBMS (Rational Data Base Management System) back end.
- It supports Web, XML, E-Mail and console interfaces.
- Bugzilla has a wide range of customized, user preferences features.
- It supports localized web user interface.
- Extensive configurability as it allows to be configured with other test management tools for a better user experience.
- Bugzilla has a smooth upgrade pathway among different versions.
In the next chapter, we will discuss the prerequisites for installing Bugzilla.
Bugzilla - Installation Prerequisites
To install and run Bugzilla on the server, the core requirement is to have Perl installed. This means that Bugzilla can be installed on any platform, where Perl can be installed; including Windows, Linux and Mac OS X.
Hardware Requirements
- It is recommended to have a 4 GB RAM or more.
- Should have a Fast Processor, for instance, at least 3GHz or more.
- The hard disk space depends on the size of the team and the number of defects. A 50GB hard disk memory is a quite enough.
Software Requirements
Bugzilla requires a database server, a web server and Perl. In all the cases, (the newer, the better) the newer releases have more bug fixes, but they are still supported and they still get security fixes from time to time.
- Perl − Bugzilla 4.4 and older requires Perl 5.8.1 or newer, but Bugzilla 5.0 and newer will require Perl 5.10.1 or newer. It is not recommend installing Perl 5.8.x at this stage. Instead, install Perl 5.12 or newer, as these newer versions have some useful improvements, which will give better user experience.
- Database Server − Bugzilla supports MySQL, PostgreSQL, Oracle and SQLite. MySQL and PostgreSQL are highly recommended, as they have the best support from Bugzilla and are used daily by the Bugzilla developers. Oracle has several known issues and is a 2nd-class citizen. It should work decently in most cases, but may fail miserably in some cases too. SQLite is recommended for testing purposes only for small teams. If MySQL is used, version 5.0.15 is required by Bugzilla 4.x, but highly recommended version 5.5 or newer. For PostgreSQL installation, version 8.3 is required.
- Web Server − Bugzilla has no minimum requirements for its web server. It is recommended to install Apache 2.2, although Bugzilla works fine with IIS too (IIS 7 or higher recommended). To improve performances in Apache, recommend to enable its mod_perl module.
Bugzilla - Installation
The Bugzilla GIT website is the best way to get Bugzilla. Download and install GIT from the website − https://git-scm.com/download and Run it.
git clone --branch release-X.X-stable https://github.com/bugzilla/bugzilla
C:\bugzilla
Where, "X.X" is the 2-digit version number of the stable release of Bugzilla (e.g. 5.0)
The another way to download Bugzilla is from the following link − https://www.bugzilla.org/download/ and move down to the Stable Release section and select the latest one from the list as shown in the following screenshot. Click on Download Bugzilla 5.0.3.
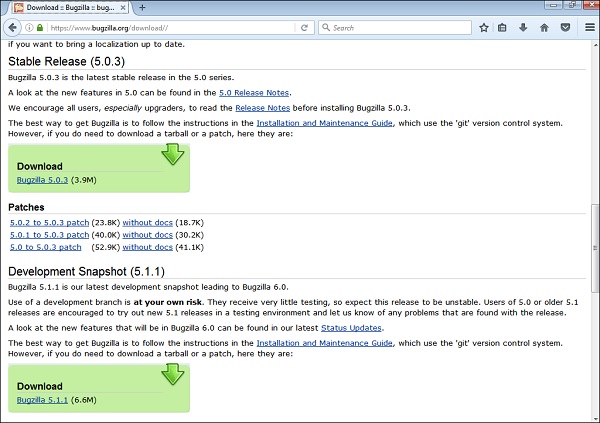
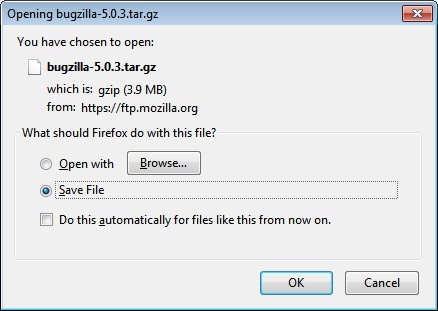
Bugzilla comes as a 'tarball' (.tar.gz extension), which any competent Windows archiving tool should be able to open.
PERL Modules
Bugzilla requires a number of Perl modules to be installed. Some of them are mandatory, and some others, which enable additional features, are optional.
In ActivePerl, these modules are available in the ActiveState repository, and are installed with the ppm tool. Either it can use it on the command line or just type ppm and the user will get a GUI.
Install the following mandatory modules with the following command.
ppm install <modulename>
Some of the most important PERL modules have been described below.
- CGI.pm − It is an extensively used Perl module for programming the CGI (Common Gateway Interface) web applications. It helps to provide a consistent API for receiving and processing user inputs.
- Digest-SHA − The Digest-SHA1 module allows you to use the NIST SHA-1 message digest algorithm from within the Perl programs. The algorithm takes as input a message of arbitrary length and produces as output a 160-bit "fingerprint" or "message digest" of the input.
- TimeDate − TimeDate is a class for the representation of time/date combinations, and is part of the Perl TimeDate project.
- DateTime − DateTime is a class for the representation of date/time combinations, and is part of the Perl DateTime project.
- DateTime-TimeZone − This class is the base class for all time zone objects. A time zone is represented internally as a set of observances, each of which describes the offset from GMT for a given time period.
- DBI − It is the standard database interface module for Perl. It defines a set of methods, variables and conventions that provide a consistent database interface independent of the actual database being used.
- Template-Toolkit − The Template Toolkit is a collection of Perl modules, which implement a fast, flexible, powerful and extensible template processing system. It can be used for processing any kind of text documents and is input-agnostic.
- Email-Sender − The Email-Sender replaces the old and problematic email send library, which did a decent job at handling the simple email sending tasks, but it was not suitable for serious use for a several reasons.
- Email-MIME − This is an extension of the Email-Simple module. It is majorly used to handle MIME encoded messages. It takes a message as a string, splits it into its constituent parts and allows you to access the different parts of the message.
- URI − A Uniform Resource Identifier is a compact string of characters that identifies an abstract or physical resource. A URI can be further classified as either a Uniform Resource Locator (URL) or a Uniform Resource Name (URN).
- List-MoreUtils − It provides some trivial but commonly needed functionality on lists, which is not going to go into the List-Util module.
- Math-Random-ISAAC − The ISAAC (Indirection, Shift, Accumulate, Add, and Count) algorithm is designed to take some seed information and produce seemingly random results as the output.
- File-Slurp − This module provides subs that allow you to read or write files with one simple call. They are designed to be simple, have flexible ways to pass in or get the file content and are very efficient.
- JSON-XS − This module converts the Perl data structures to JSON and vice versa. The primary goal of JSON-XS is to be correct and its secondary goal is to be fast.
- Win32 − The Win32 module contains functions to access Win32 APIs.
- Win32-API − With this module, you can import and call arbitrary functions from the Win32's Dynamic Link Libraries (DLL), without having to write an XS extension.
- DateTime-TimeZone-Local-Win32 − This module provides methods for determining the local time zone on a Windows platform.
The following modules enable various optional Bugzilla features; try to install these based on your requirements −
- GD − The GD module is only required if you want graphical reports.
- Chart − This module is only required if you would want graphical reports as the GD module.
- Template-GD − This module has the template toolkit for the template plugins.
- GDTextUtil − This module has the text utilities for use with the GD.
- GDGraph − It is a Perl5 module to create charts using the GD module.
- MIME-tools − MIME-tools is a collection of Perl5 MIME modules for parsing, decoding and generating single or multipart (even nested multipart) MIME messages.
- libwww-perl − The World Wide Web library for Perl is also called as the libwww-perl. It is a set of Perl modules, which give Perl programming an easy access to send requests to the World Wide Web.
- XML-Twig − It is a Perl module used to process XML documents efficiently. This module offers a tree-oriented interface to a document while still allowing the processing of documents of any size.
- PatchReader − This module has various utilities to read and manipulate patches and CVS.
- perl-ldap − It is a collection of modules that implements LDAP services API for Perl programs. This module may be used to search directories or perform maintenance functions such as adding, deleting or modifying entries.
- Authen-SASL − This module provides an implementation framework that all protocols should be able to share.
- Net-SMTP-SSL − This module provides the SSL support for Net-SMTP 1.04
- RadiusPerl − This module provides simple Radius client facilities.
- SOAP-Lite − This module is a collection of Perl modules, which provide a simple and lightweight interface to the Simple Object Access Protocol (SOAP) on both the client and the server side.
- XMLRPC-Lite − This Perl module provides a simple interface to the XML-RPC protocol both on client and server side.
- JSON-RPC − A set of modules that implement the JSON RPC 2.0 protocols.
- Test-Taint − This module has Tools to test taintedness.
- HTML-Parser − This module defines a class HTMLParser, which serves as the basis for parsing text files formatted in HTML and XHTML.
- HTML-Scrubber − This module helps to sanitize of scrub the html input in a reliable and flexible fashion.
- Encode − This module provides an interface between Perl's strings and the rest of the system.
- Encode-Detect − This module is an Encode-Encoding subclass that detects the encoding of data.
- Email-Reply − This module helps in replying to an email or a message.
- HTML-FormatText-WithLinks − This module takes HTML and turns it into plain text, but prints all the links in the HTML as footnotes.
- TheSchwartz − This module is a reliable job queue system.
- Daemon-Generic − This module provides a framework for starting, stopping, reconfiguring daemon-like programs.
- mod_perl − This module helps in embedding a Perl interpreter into the Apache server.
- Apache-SizeLimit − This module allows you to kill the Apache httpd processes, if they grow too large.
- File-MimeInfo − This module is used to determine the mime type of a file.
- IO-stringy − This toolkit mainly provides modules for performing both traditional and object-oriented (i/o) on things other than normal filehandles.
- Cache-Memcached − This module is a client library for the memory cache daemon (memcached).
- Text-Markdown − This module is a text-to-HTML filter; it translates an easy-to-read / easy-to-write structured text format into HTML.
- File-Copy-Recursive − This module is a Perl extension for recursively copying files and directories.
In Strawberry Perl, use the cpanm script to install modules. Some of the most important modules are already installed by default. The remaining ones can be installed using the following command −
cpanm -l local <modulename>
The list of modules to install will be displayed by using the checksetup.plcommand.
Bugzilla - Sample Web Application
The Bugzilla installation requires several technical aspects to start with. A few websites provide the Bugzilla web application – Landfill: The Bugzilla Test Server is one of these. https://landfill.bugzilla.org/bugzilla-2.16.11/this is the testing and demonstration website.
Note − Landfill is a home for test installations of the Bugzilla bug-tracking system. If you are evaluating Bugzilla, you can use them to try it. They are also useful if you are a developer and want to try to reproduce a bug that somebody has reported.
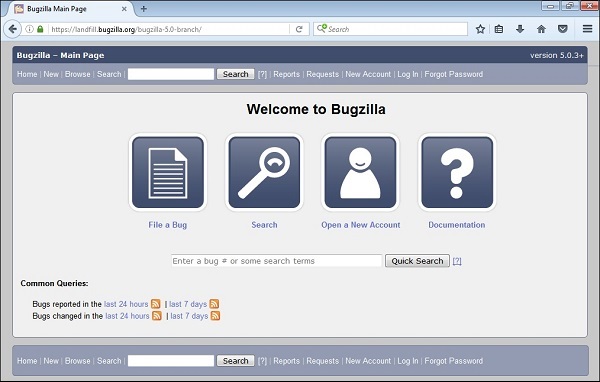
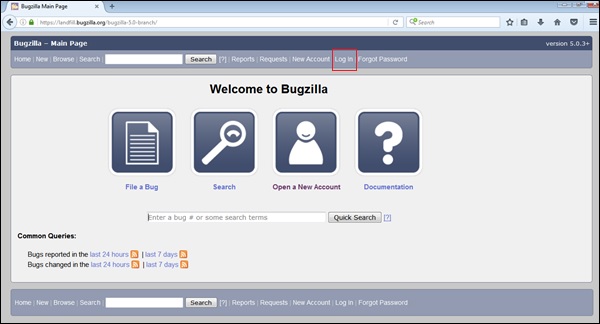
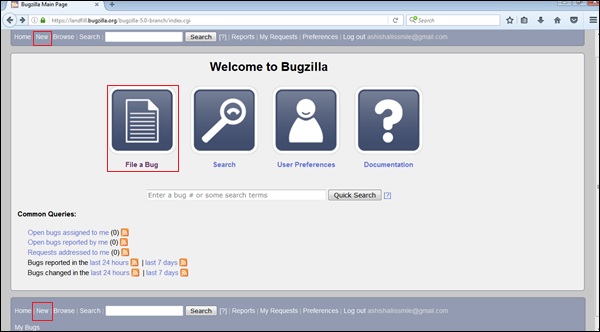
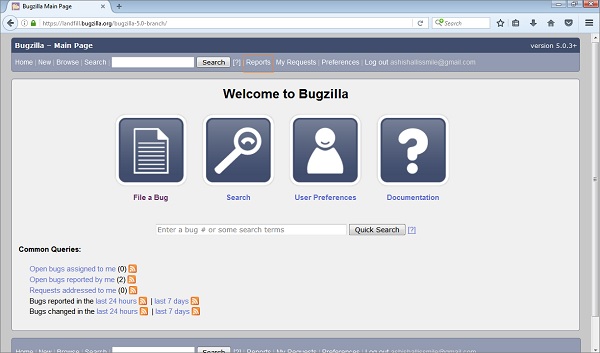
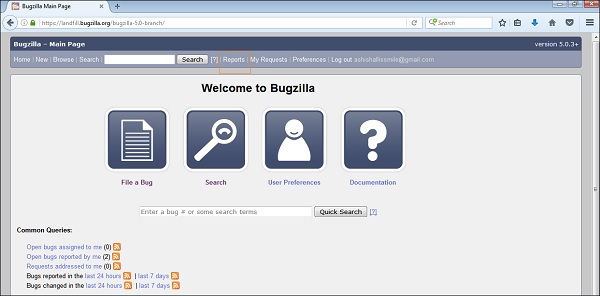
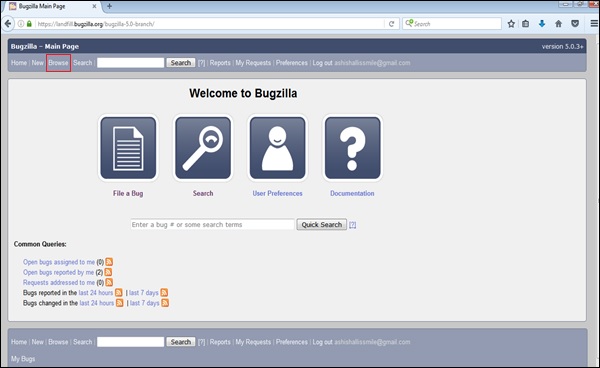
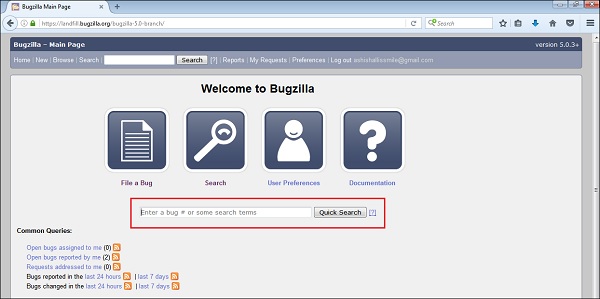
Once you navigate to the above-mentioned URL, the Bugzilla home page will display as shown below −
Bugzilla - New Account Creation
The process of creating an account is similar to any other web based application like Facebook, Gmail, etc.
Following are the steps to create an account −
Step 1 − Go to https://landfill.bugzilla.org/bugzilla-5.0-branch/
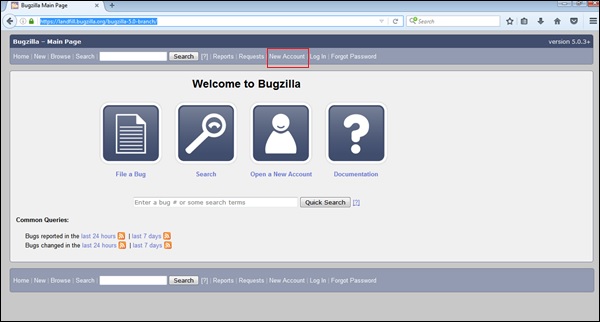
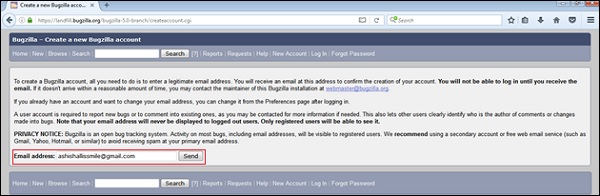
Step 2 − On the Bugzilla home page, click the New Account link placed on the header as shown in the following screenshot.
Step 3 − Enter the email address and click on Send.
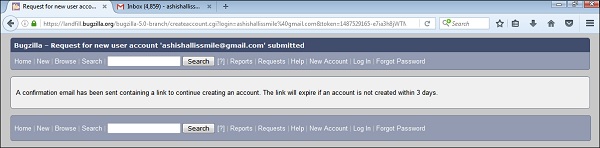
Step 4 − Within moments, the user will receive an email to the given address. This Email should have a login name and a URL to confirm the registration.
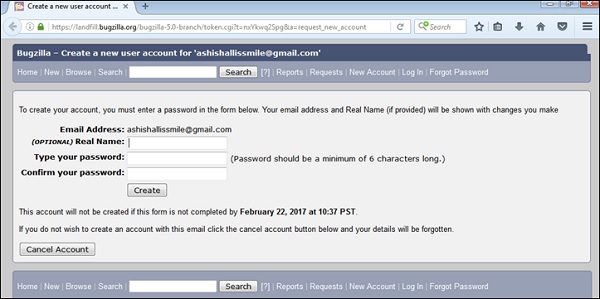
Step 5 − Once the registration is confirmed, Bugzilla will ask the real name (optional, but recommended) and ask the user to type their password and confirm their password. Depending on how Bugzilla is configured, there may be minimum complexity requirements for the password.
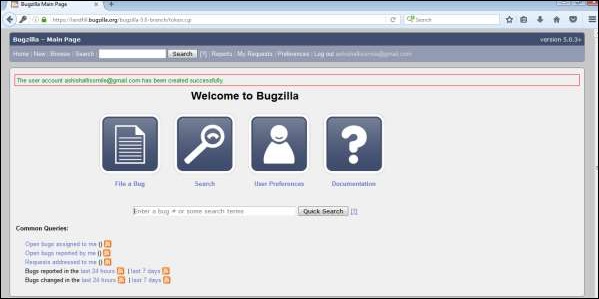
Step 6 − Once the details are filled, click on Create, a successful message of account creation displays on the screen, else it will display an error message. Correct the error and then click on Create.
Bugzilla - Login
To login into Bugzilla, we have to follow the steps given below.
Step 1 − Click on the Log In link on the header of the homepage.
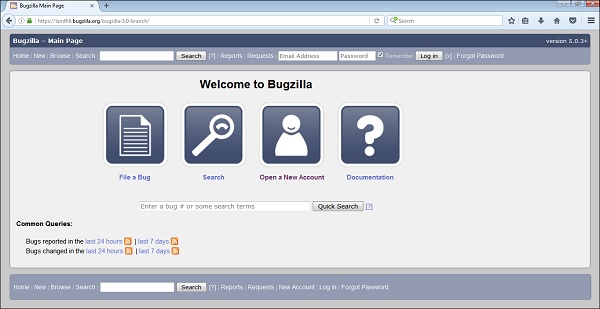
Step 2 − Enter the Email Address, Password and click on Log In
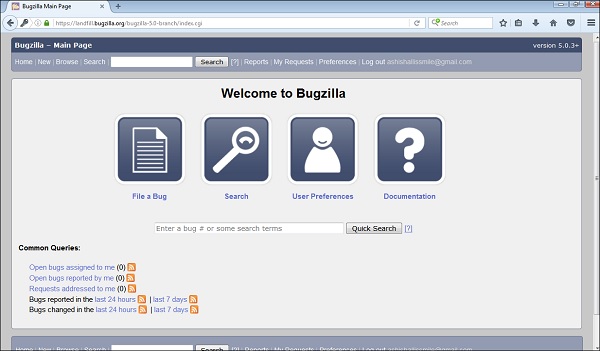
Step 3 − The user will be logged in successfully; the users can see their user id in the header section.
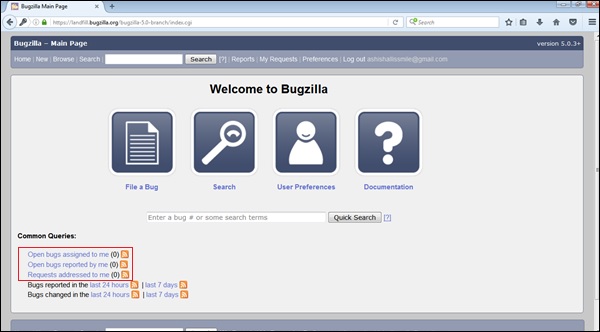
Step 4 − The user can see open bugs assigned to him, reported by him and requests addressed to him at the left bottom section.
Bugzilla - Logging a New Bug
The procedure of filling a new bug is quite simple and has been explained below.
Step 1 − Click on the ‘New’ link, present on the header or the footer or Click on the File a Bug button on the home page as shown in the following screenshot.
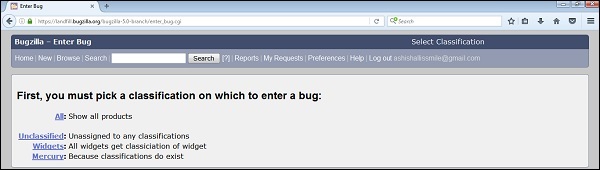
Step 2 − Now, select the product group in which the bug is noticed.
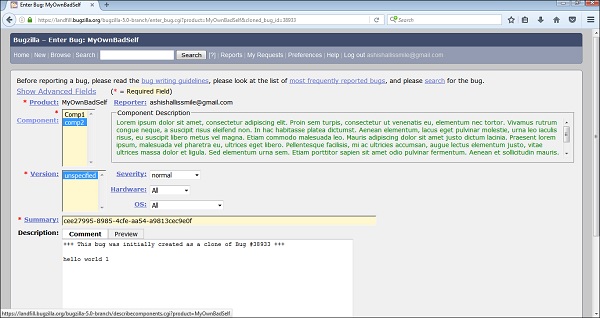
Step 3 − After selecting the Product, a form will appear where the user should enter the following details related to the bug −
- Enter Product
- Enter Component
- Give Component description
- Select version
- Select severity
- Select Hardware
- Select OS
- Enter Summary
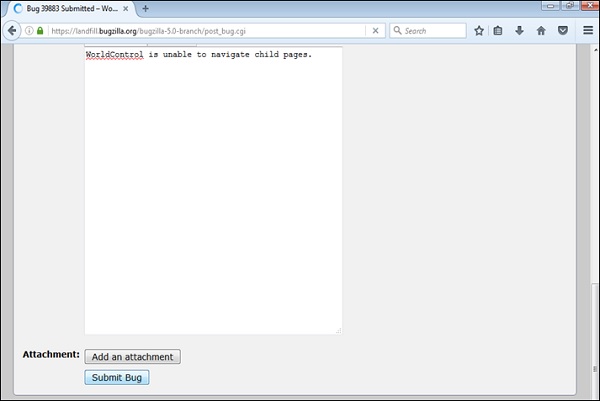
- Enter Description
- Attach Attachment
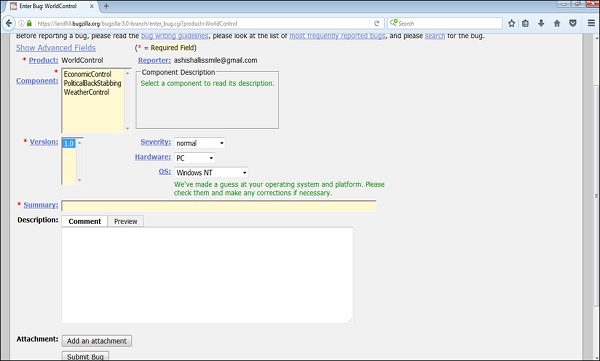
Note − The above fields vary as per the customization of Bugzilla. The Mandatory fields are marked with a red asterisk (*).
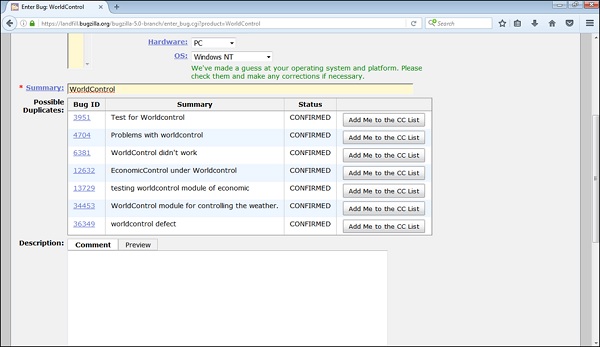
Step 5 − Once the user starts typing in the Summary, Bugzilla filters the already logged in defects and displays the list to avoid duplicate bugs.
Step 6 − Click on the Submit Bug button to log the bug.
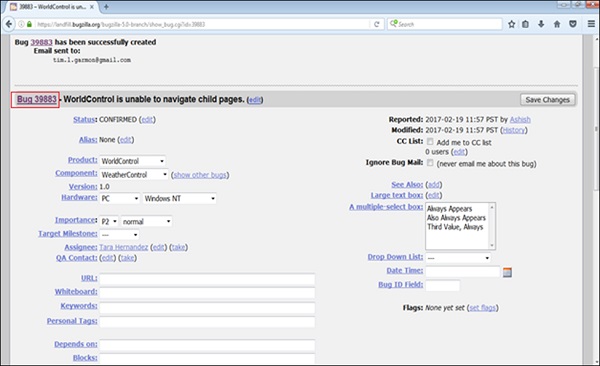
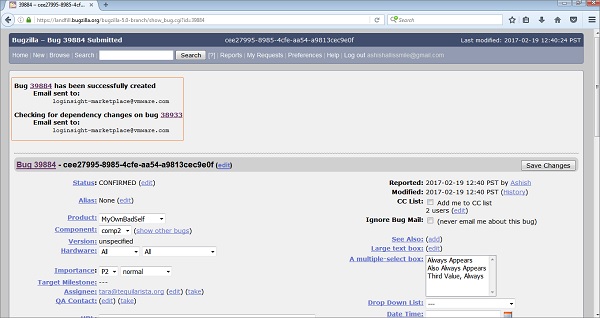
Step 7 − As soon as the user clicks on the Submit bug button, a Bug Id is generated with the details that of bug as that were entered.
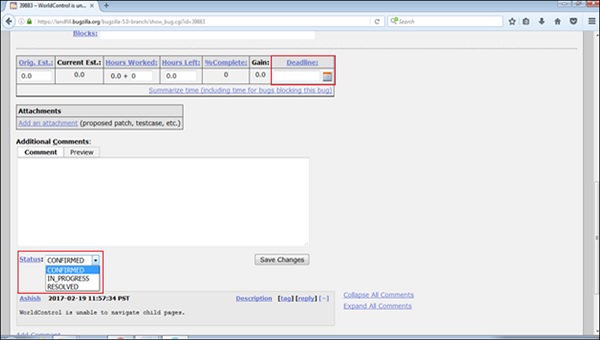
Step 8 − The Deadline and the Status will be shown as depicted in the following screenshot.
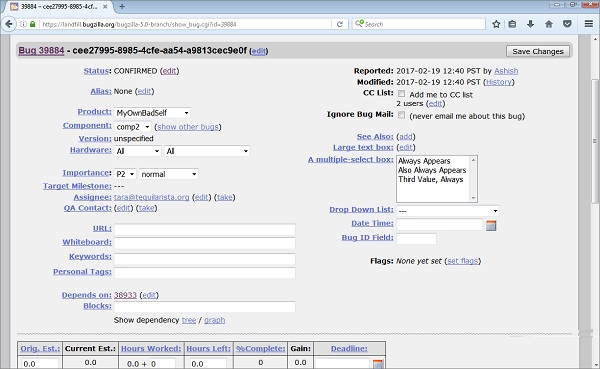
A user can also add additional information to the assigned bug like URL, keywords, whiteboard, tags, etc. This extra-information is helpful to give more details about the Bug that is created.
- Large text box
- URL
- Whiteboard
- Keywords
- Tags
- Depends on
- Blocks
In the next chapter, we will learn how a bug can be cloned.
Bugzilla - Clone a Bug
Bugzilla has the provision of "Cloning" an existing bug. The newly created bug keeps most of the settings from the old bug. This helps in tracking similar concerns that require different handling in a new bug.
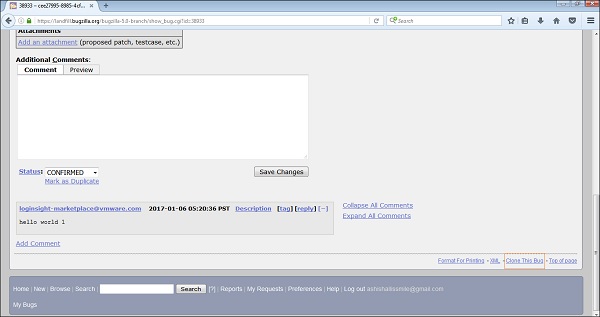
To use this, go to the bug that user wants to clone. Then click on the “Clone This Bug” link on the footer of the bug page as shown in the screenshot below.
After clicking on clone the bug link, the page will navigate the user to the Product group selection page. Once on the selection page, the user has to select a product.
Enter the Bug page that is filled with the values same as the old bug has.
The User can change the values and/or text if needed.
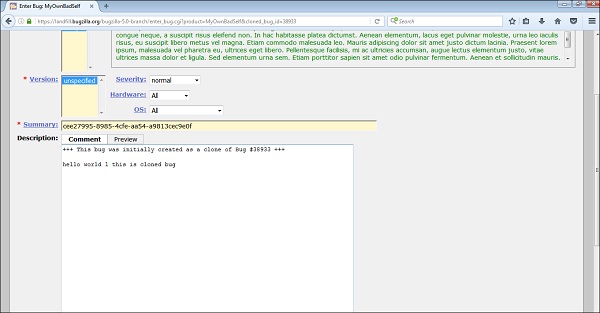
Then, click on Submit Bug. Bug is logged successfully with dependency details.
Bugzilla - Understanding a Bug
The main feature or the heart of Bugzilla is the page that displays details of a bug. Note that the labels for most fields are hyperlinks; clicking them will take to context-sensitive help of that particular field. Fields marked * may not be present on every installation of Bugzilla.
- Summary − It is a one-sentence summary of the problem, which is displayed in the header next to the bug number. It is similar to the title of the bug that gives the user an overview of the bug.
- Status (and Resolution) − These define status of the bug – It starts with even before being confirmed as a bug, then being fixed and the fix being confirmed by Quality Assurance. The different possible values for Status and Resolution on installation should be documented in the context-sensitive help for those items. Status supports Unconfirmed, Confirmed, Fixed, In Process, Resolved, Rejected, etc.
- Alias − An Alias is a unique short text name for the bug, which can be used instead of the bug number. It provides the unique identifiers and help to find the bug in case of Bug ID is not handy. It can be useful while searching for a bug.
- Product and Component − Bugs are divided by Products and Components. A Product may have one or more Components in it. It helps to categorize the bugs and helps in segregating them as well.
- Version − The "Version" field usually contains the numbers or names of the released versions of the product. It is used to indicate the version(s) affected by the bug report.
- Hardware (Platform and OS) − These indicate the tested environment or the operating system, where the bug was found. It also gives out the details of the hardware like RAM, Hard Disk Size, Processor, etc.
- Importance (Priority and Severity) − The Priority field is used to prioritize bugs. It can be updated by the assignee, business people or someone else from stakeholders with the authority to change. It is a good idea not to change this field on other bugs, which are not raised by a person. The default values are P1 to P5.
- Severity Field − The Severity field indicates how severe the problem is—from blocker ("application unusable") to trivial ("minor cosmetic issue"). User can also use this field to indicate whether a bug is an enhancement or future request. The common supportive severity statuses are – Blocker, Critical, Major, Normal, Minor, Trivial and enhancement.
- Target Milestone − It is a future date by which the bug is to be fixed. Example – The Bugzilla Project's milestones for future Bugzilla versions are 4.4, 5.0, 6.0, etc. Milestones are not restricted to numbers though the user can use any text strings such as dates.
- Assigned To − A Bug is assigned to a person who is responsible to fix the bug or can check the credibility of the bug based on the business requirement.
- QA Contact − The person responsible for quality assurance on this bug. It may be the reporter of the bug to provide more details if required or can be contacted for retest the defect once it is fixed.
- URL − A URL associated with the bug, if any.
- Whiteboard − A free-form text area for adding short notes, new observations or retesting comments and tags to a bug.
- Keywords − The administrator can define keywords that can be used to tag and categories bugs — for e.g. crash or regression.
- Personal Tags − Keywords are global and visible by all users, while Personal Tags are personal and can only be viewed and edited by their author. Editing those tags will not send any notifications to other users. These tags are used to keep track of bugs that a user personally cares about, using their own classification system.
- Dependencies (Depends On and Blocks) − If a bug cannot be fixed as some other bugs are opened (depends on) or this bug stops other bugs for being fixed (blocks), their numbers are recorded here.
Dependency Tree Link
Clicking on the Dependency tree link shows the dependency relationships of the bug as a tree structure. A user can change how much depth to show and hide the resolved bugs from this page. A user can also collapse/expand dependencies for each non-terminal bug on the tree view, using the [-] / [+] buttons that appear before the summary.
- Reported − It is the Time and Date when the bug is logged by a person in the system.
- Modified − It is the Date and Time when the bug was last changed in the system.
- CC List − A list of people who get mail when the bug changes, in addition to the Reporter, Assignee and QA Contact (if enabled).
- Ignore Bug Mail − A user can check this field if he never wants to get an email notification from this bug.
- See Also − Bugs, in this Bugzilla, other Bugzilla or other bug trackers those are related to this one.
- Flags − A flag is a kind of status that can be set on bugs or attachments to indicate that the bugs/attachments are in a certain state. Each installation can define its own set of flags that can be set on bugs or attachments.
- Time Tracking − This form can be used for time tracking. To use this feature, a user has to be a member of the group specified by the timetrackinggroup parameter.
- Orig. Est. − This field shows the original estimated time.
- Current Est. − This field shows the current estimated time. This number is calculated from Hours Worked and Hours Left.
- Hours Worked − This field shows the number of hours worked on the particular defect.
- Hours Left − This field shows the Current Est. - Hours Worked. This value + Hours Worked will become the new Current Estimated.
- %Complete − This field shows how much percentage of the task is complete.
- Gain − This field shows the number of hours the bug is ahead of the Original Estimated.
- Deadline − This field shows the deadline for this bug.
- Attachments − A user can attach files (evidence, test cases or patches) to bugs. If there are any attachments, they are listed in this section.
- Additional Comments − A user can add comments to the bug discussion here, if user/tester has something worthwhile to say.
In the next chapter, we will learn how to edit a bug.
Bugzilla - Editing a Bug
Bugzilla has a provision of editing an existing bug. A user can edit a bug during the lifecycle of any bug. Most of the fields have an edit hyperlink. It depends on administrator of Bugzilla to provide edit options with different fields.
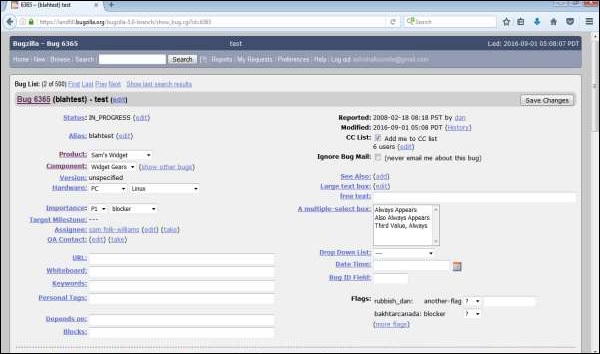
In the following screenshot, there are many fields that have an edit hyperlink such as – Status, Alias, Assignee, QA Contact, ‘Depends on’, Large Text box, Flags, CC list, etc.
Click on the edit hyperlink of a particular field, that field will display as editable and the user can edit the field accordingly.
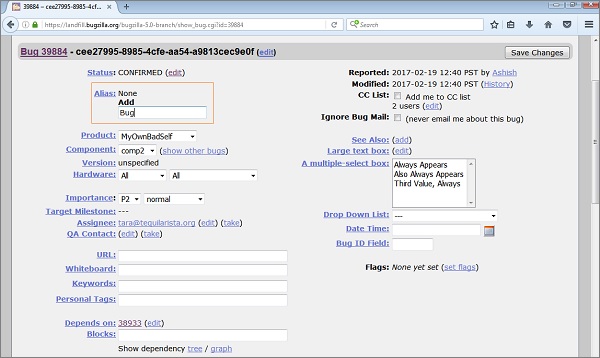
After the editing is done, click on Save Changes button, which is on the top right hand corner of the page as shown in the screenshot below.
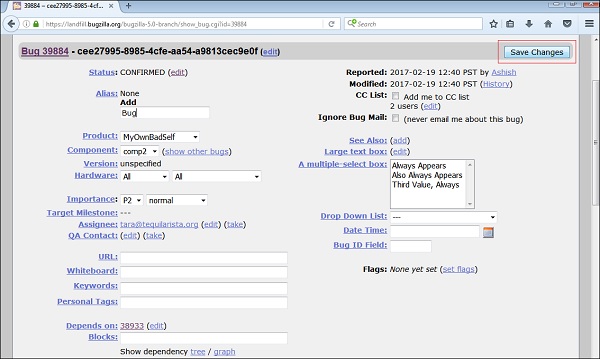
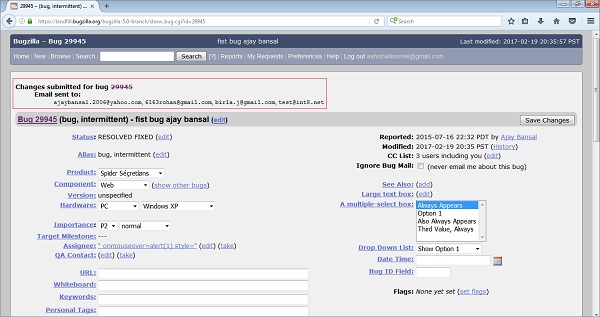
After the changes are successfully done, the advisory will display of the bug details as shown in the following screenshot.
Bugzilla - Reports
A report helps to analyse the current state of the bug. The purpose of a Defect Report is to see the behaviour, communication, analysis and the current stage of a defect at any stage of the defect lifecycle. Defect reports are even useful after closing the defect and analysis the product and development quality.
Following are some of the important points to consider regarding the various Bugzilla reports.
- Bugzilla supports those Tabular Reports that have HTML or CSV reports.
- Tabular reports can be viewed in 1-Dimensional, 2-Dimensional or 3-Dimensional ways.
- The most common type of report supported by Bugzilla are the Graphical Reports.
- Graphical Reports contain line graph, bar and pie charts.
- Report functionality is based on Search and filter concept, for which the conditions are given by users.
- The user provides his preference of vertical and horizontal axis to plot graphs, charts or tables along with filter criteria’s like Project, Component, Defect Status, etc.
- The user can even choose 3-D reports for tables and images.
Navigating the Reports Section
For navigating the reports section in Bugzilla, we should follow the steps given below.
Step 1 − Click on the Reports link in the header of the homepage.
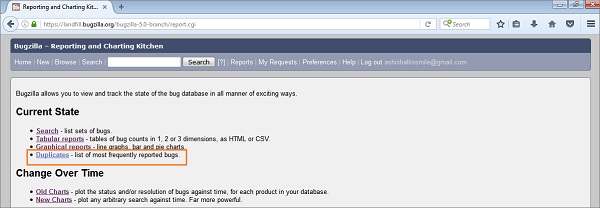
Step 2 − Bugzilla displays the Reporting and Charting Kitchen page. It has two sections to generate different type of reports – Tabular Reports and Graphical Reports.
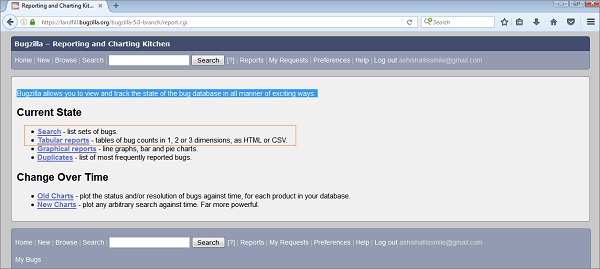
Other links like −
- Search − It will navigate the user to the standard search page.
- Duplicate − It will display the most frequently reported bugs.
In the next chapter, we will understand what graphical reports are and how to generate them.
Bugzilla - Graphical Reports
Graphical reports are a group of line, bar and pie charts. These Reports are helpful in many ways, for example if a user wants to know which component has the maximum number of defects reported and wants to represent in the graph, then that user can select from the following two options −
- Severity on the X-axis
- Component on the Y-axis
Then click on Generate Report.
It will generate a report with crucial information. Similarly, the user can a select number of combinations from those that are available.
Generate Graphical Reports
To generate graphical reports in Bugzilla, we have to follow the steps given below.
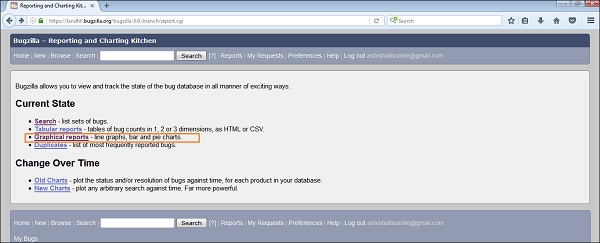
Step 1 − To begin with, click on the Reports link at the header of the homepage.
Step 2 − Click on the Graphical Reports hyperlink, which is listed under the Current State section as shown in the following screenshot.
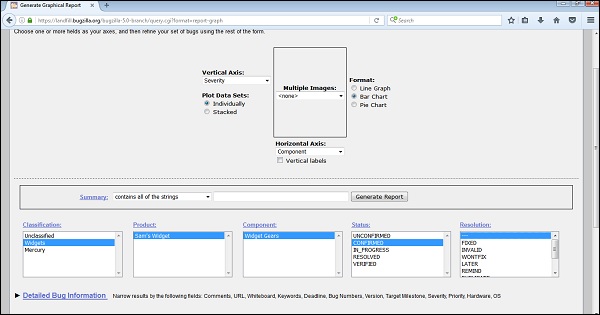
Step 3 − Now, set various options to present reports graphically. Some of the important options are given below.
- Vertical Axis
- Horizontal Axis
- Multiple Images
- Format- Line graph, Bar chart or Pie chart
- Plot data set
- Classify your bug
- Classify your product
- Classify your component
- Classify bug status
- Select resolution
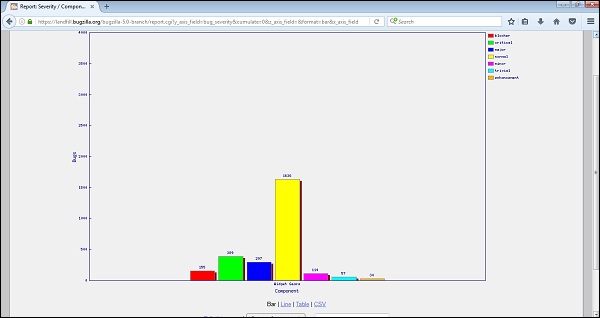
Step 4 − Click on Generate Report to display a Bar chart, where the Severityof a bug is the vertical axis, while the Component “Widget Gears” is the horizontal axis.
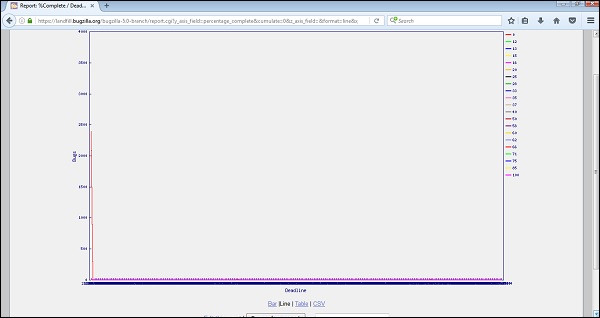
Step 5 − Similarly, a Line Graph can be created for % Complete Vs Deadline.
The result for the above mentioned line graph will be as follows.
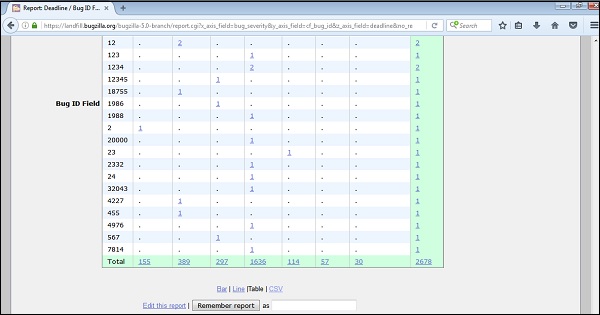
Bugzilla - Tabular Reports
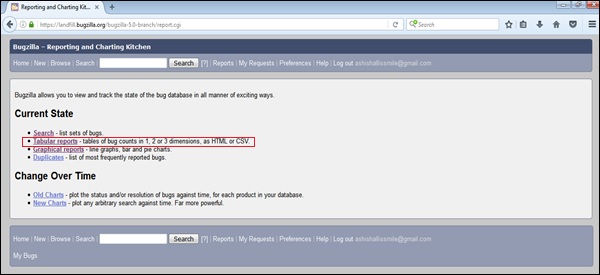
The Tabular Reports represent tables of bug counts in 1, 2 or 3 dimensions as HTML or CSV. To generate Tabular reports in Bugzilla, we have to follow the steps given below.
Step 1 − Click on the Reports hyperlink in the Header section of the homepage and then click on the Tabular Reports in the Current State section as shown in the following screenshot.
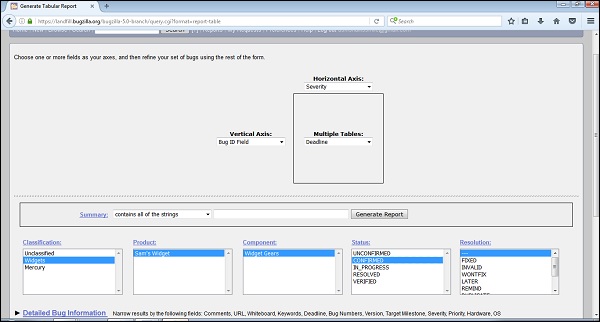
Step 2 − Similar to Graphical Reports, select Vertical, Horizontal axis along with Multiple tables (if required) and provide details in the other fields.
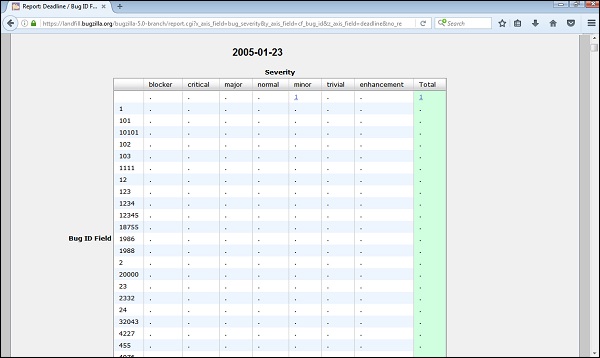
Step 3 − After selecting all the fields, click on Generate Report. Based on the deadlines, it generates multiple tables −
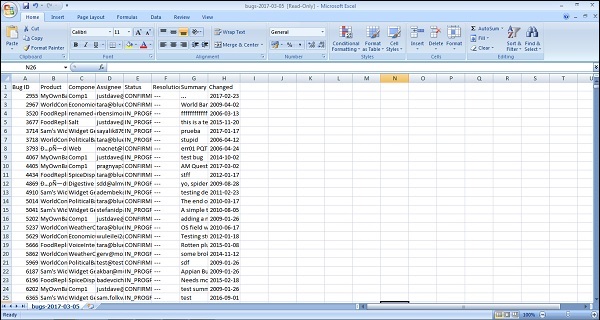
Step 4 − By clicking on CSV hyperlink below the table, it converts the report into a CSV file.
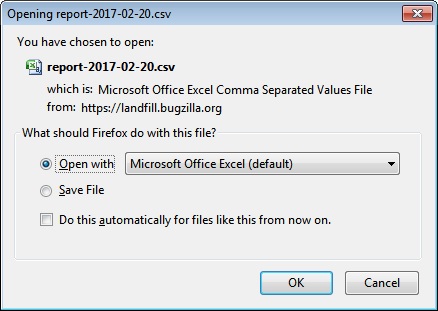
Click OK after the appropriate selection, it will open an Excel sheet with the details of all the data tables.
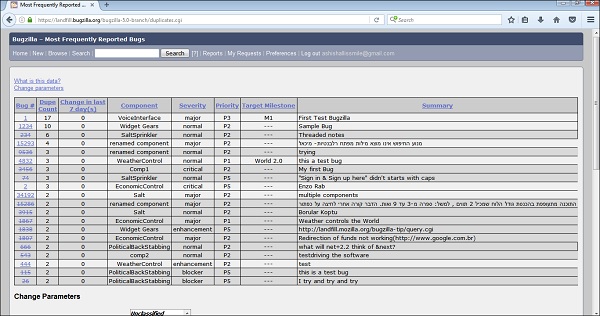
Bugzilla - Duplicate
In Bugzilla, Duplicates are a list of bugs, which are raised most frequently.
- Duplicates are the most frequently seen open bugs.
- Duplicates count the numbers as the Dupe Count of direct and indirect duplicates of a defect report. This information is helpful to minimize the number of duplicate defects.
- Duplicates help to save time for QA engineers to log a new defect always.
- Duplicates also help stakeholders to find out the root cause, if the same defects are reopened repeatedly rather than just a new defect.
Using the Duplicates List of Bugs
Review the most frequent bug list with the respective issue noticed. If the problem is listed as a bug in the list, then click on the bug id to view details and confirm whether it is the same issue or not. Comment on the additional observation, link it with your Test Case if required and re-open if it is closed.
If the exact problem is not listed, try to find a similar defect that is already listed. If the user finds the defect that are dependent on new observations, he can comment and link the defect. If the user cannot find the defect, log a new one.
Generate Duplicate Reports
To generate Duplicate reports in Bugzilla, we have to follow the steps given below.
Step 1 − Click on the Report hyperlink in the header of the homepage.
Step 2 − As soon as you click on Report, the Reporting and Charting Kitchen page opens. Click on Duplicates hyperlink under the Current State section.
Step 3 − By clicking on Duplicates, open the Most Frequently Reported Bugs table. It has various columns as Bug Id, Dupe Count, Component, Severity, Priority, Target Milestone, and Summary.
Changing the Parameters
This is an interesting feature to filter or customize the Most Frequently Reported Bug tables. Following are some of the important pointers, which are explained in detail.
- Restrict to product − It filters out the table based on specific Product and components. The user can choose from single or multiple products by pressing CTRL + Click.
- When sorting or restricting, work with − It has two options, either the entire list or the currently visible list.
- Max Rows − The user can give a number to see the number of defects in one page.
- Change column is change in last − The number of days a user wants to review the changes that have taken place.
- Open Bugs only − This will filter out all the bugs those are closed. The result will have a list of only open defects.
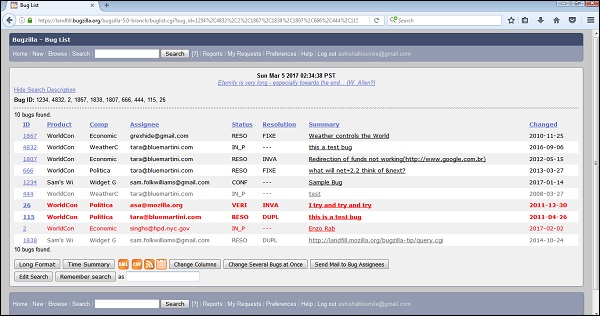
When the user Clicks on the Change button, all these filters will change and the bug list will be filtered out.

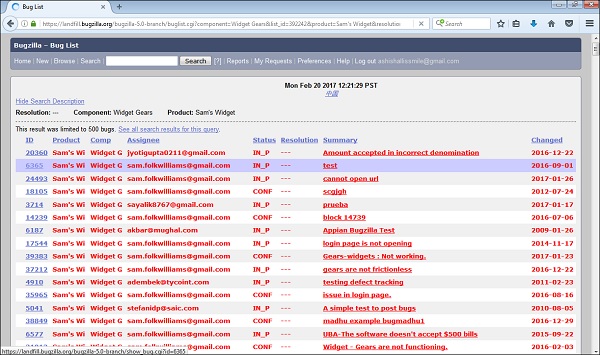
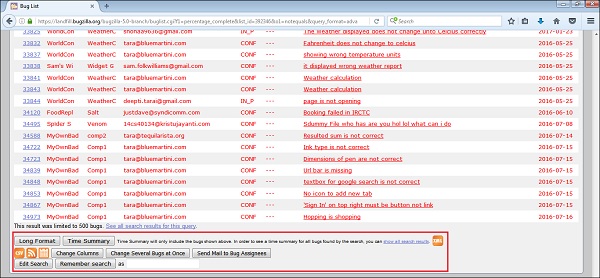
When clicking on the Bug List button at “Or just give this to me as a Bug List”, the resulting table will display in the format of a Bug List page as shown in the screenshot below −
Bugzilla - Browse Function
The Browse Function is one of the most important features of Bugzilla to find/trace/locate an existing logged bug.
Following are steps to use this feature −
Step 1 − Click on the Browse hyperlink on the header of the home page.
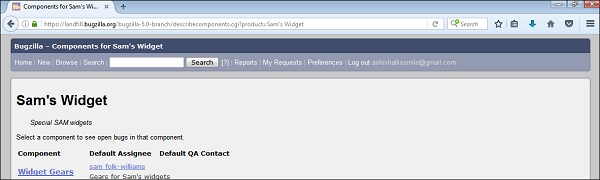
Step 2 − A window – "Select a product category to browse" as shown below, the user can browse the bug according to the category. Select the product "Sam's Widget" or any other.
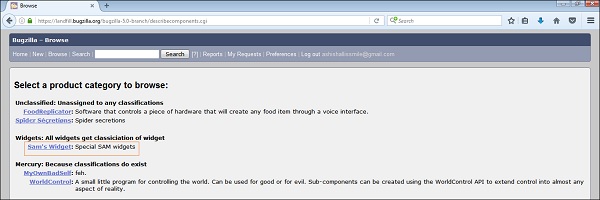
Step 3 − It opens another window, in this – click on the component Widget Gears. Bugzilla Components are sub-sections of a product. For example, here, the product is SAM'S WIDGET, whose component is WIDGET GEARS. A product can have multiple components listed.
Step 4 − When you click on the component, it will open another window. All the Bugs created under a particular category will be listed over here. From that Bug-list, click on the Bug# ID to see more details about that bug.
Step 5 − Once you click on the Bug ID, another window will open, where information about the bug can be seen in detail. In the same window, the user can also change the assignee, QA contact or the CC list.
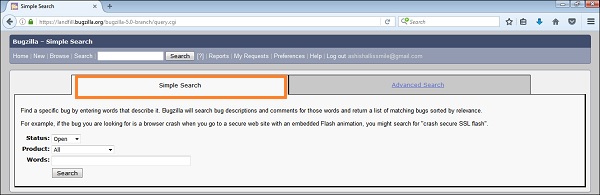
Bugzilla - Simple Search
The Simple Search feature is useful in finding a specific bug. It works like the web search engines such as Google, Bing, Yahoo, etc. The user needs to enter some keywords and then search.
Following are steps for using the simple search feature −
Step 1 − Click on the Search hyperlink in the header of the homepage.
Step 2 − Click on the Simple Search section as shown in the following screenshot.
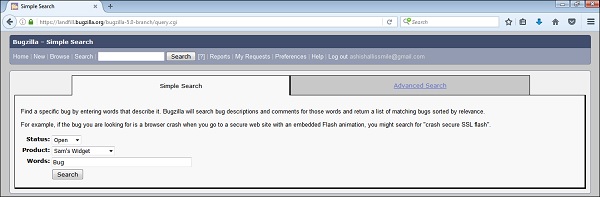
Step 3 − Choose the Status of the bug from the list to filter. Then, choose the Product from the list and enter some Keywords related to the bug. Click on the Search button.
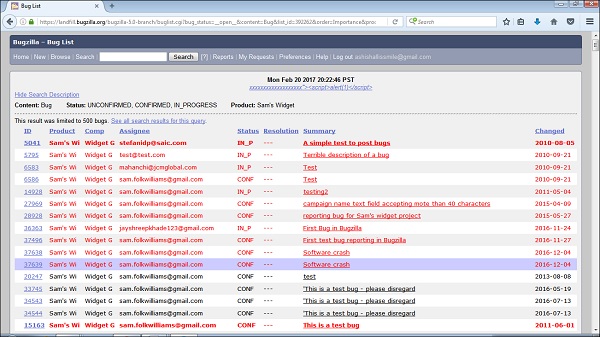
Step 4 − The result will be as shown in the following screenshot.
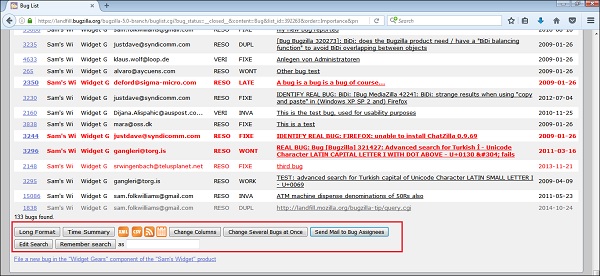
Step 5 − At the bottom of the search page, there are various options like how to see your bug - in XML Format, in Long Format or just as a Time Summary. Apart from that, the other option can be used – like sending a mail to the bug assignee, change several bugs at once or change the column of the screen, etc.
Bugzilla - Quick Search
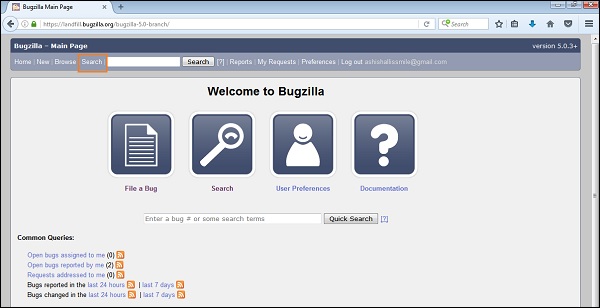
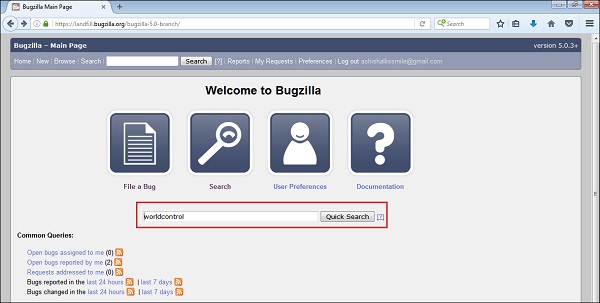
The Quick Search feature is a single-text-box query tool. It is available on the Bugzilla home page as shown in the screenshot below.
The Quick Search feature uses Meta characters to indicate what is to be searched. For example, typing bug|login into Quick Search would search for "bug" or "login" in the summary and whiteboard of a bug. The user can also use it to go directly to a bug by entering its number or its alias.
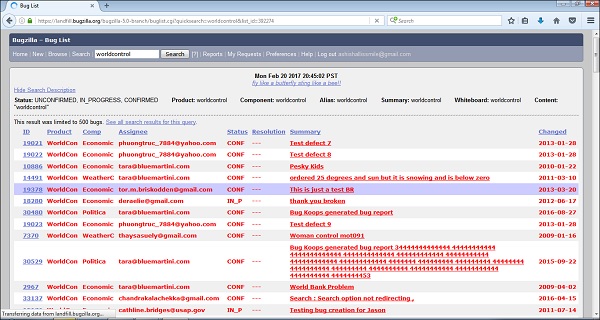
By clicking on the Quick Search button, it displays list of bugs as shown in the screenshot below.
Bugzilla - Advance Search
The Advanced Search page displays a list of all the bugs, which are filtered exactly with different criteria that have been loaded by the users.
This Advanced Search feature selects different possible values for all of the fields in a bug. For some fields, multiple values can be selected. In these cases, Bugzilla returns bugs where the content of the field matches with any one of the selected values. If none is selected, then the field can take any of values. Multiple values selection for one field is based on the “OR” functionality. If either one or any other value is matched among the user selection, the bug will be displayed.
Using Advance Search
For using the advanced search feature in Bugzilla, we have to follow the steps given below.
Step 1 − Click on the Search hyperlink on the header of the homepage. You will get two tabs, Simple Search and Advanced Search, click on the Advanced Search tab.
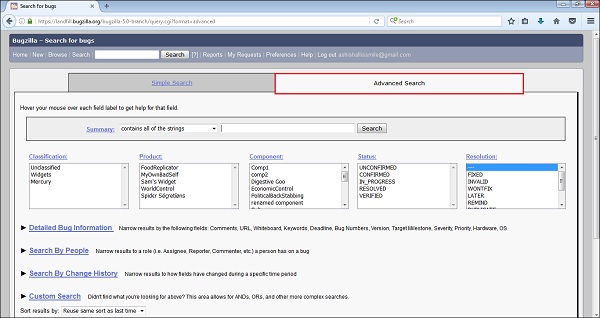
Step 2 − Select the required option from the Summary field. Then, you can enter the keyword to identify or filter out the bugs.
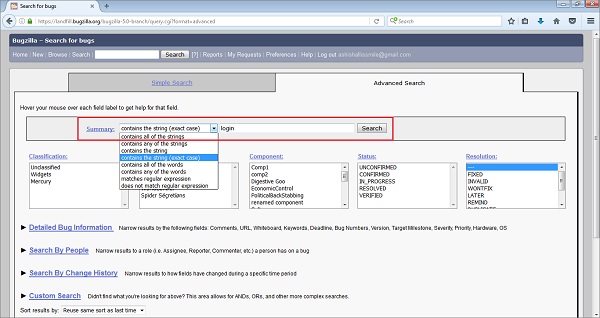
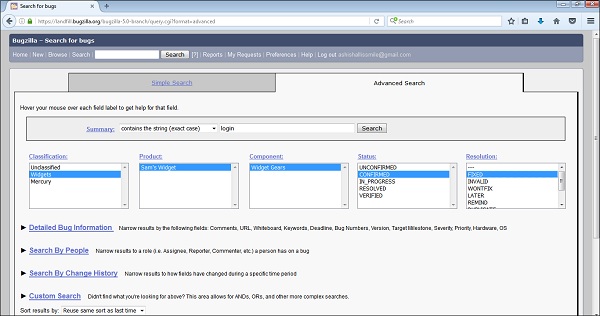
Step 3 − The next step is to select the category of Bug from the Classification box; here, we have selected Widget. Then, choose the Product under which the Bug is created; here, we have selected Sam's Widget. In the Component box, we have selected Widget Gears. In the Status box, click on Confirmed and in the Resolution box choose Fixed, all of these are shown in the following screenshot.
Note − All these fields are optional and dependent on the user’s choice.
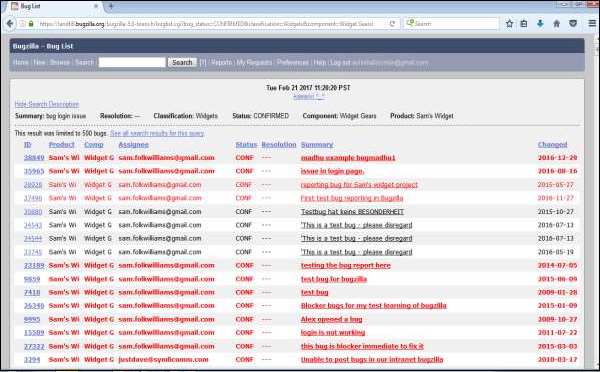
Step 4 − Click on the Search Button after entering all the fields based on the requirement of the filter.
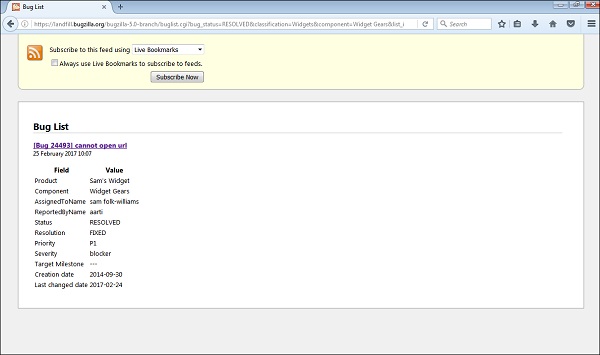
Step 5 − Advance Search will detect the bug and the result will be as follows −
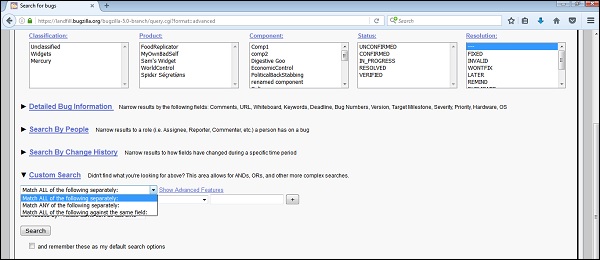
Bugzilla - Custom Search
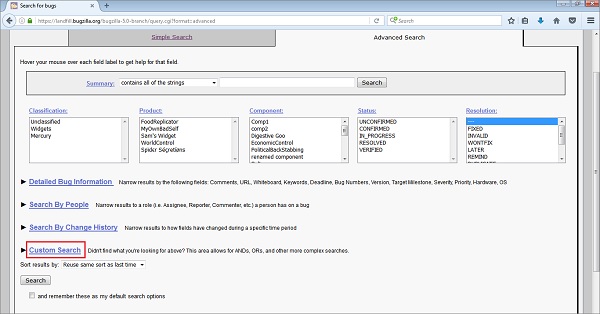
Custom Search is an extended feature of the Advanced Search. It works on the principle of – “Did not find what you are looking for above? I.e. in advanced search”. This area allows words like AND, OR, and other more complex searches.
Navigation of custom search is as follows: Search → Advanced Search → Go Down and click on Custom Search as depicted in the following screenshot.
Customizing the Custom Search
Custom Search compares a selected field with a defined operator for a specified value. It is possible that too much of this could be reproduced using the standard fields in an Advanced Search option. However, the user can combine options like "Match ANY" or "Match ALL", using parentheses for combining and priority to construct searches of complex queries.
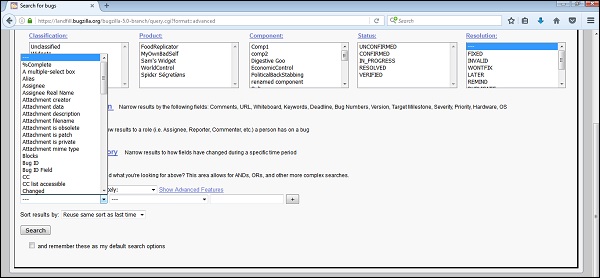
There are three fields in each row (known as a "term") of a custom search −
- Field − The name of the field being searched.
- Operator − The comparison operator.
- Value − The value to which the field is being compared.
The list of the available fields contains all the fields defined for a bug. It includes any custom fields, as well as some other fields like the Assignee Real Name, Days since Bug Changed, Time since Assignee Touched and other things, which might be useful to search further.
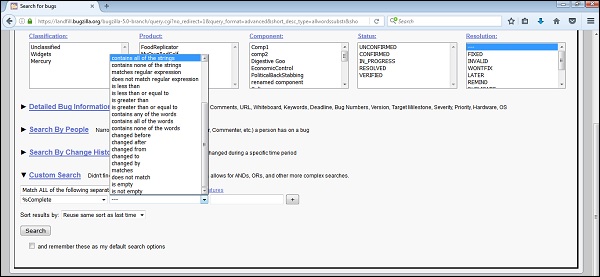
There is a wide range of operators available. There are various string-matching operations (including regular expressions), numerical comparisons (which also work for dates) and to search for change information of a bug.
When a field changed, what it changed from or to, and who did it. There are special operators is empty and is not empty, because Bugzilla cannot tell the difference between a value field left blank on purpose and one left blank by accident.
The user can have n number of rows to define operators, values and fields. There is a dropdown box above them, which defines how these rows are related with the search.
Match ALL of the following separately, Match ANY of the following separately or Match ALL of the following against the same field are three options listed in the dropdown. The difference between the first and the third can be described with a comment search. If a search is −
- Comment contains the string – “Bug”
- Comment contains the string – “issue”
Under the “match all of the following separately”, the search would return bugs, where a "Bug" appeared in one comment can be an "issue" in the same or any other comment.
Under the “match all of the following against the same field”, both strings would need to occur in exactly the same comment, i.e. it will select a bug having both Bug and issue words in the same comment.

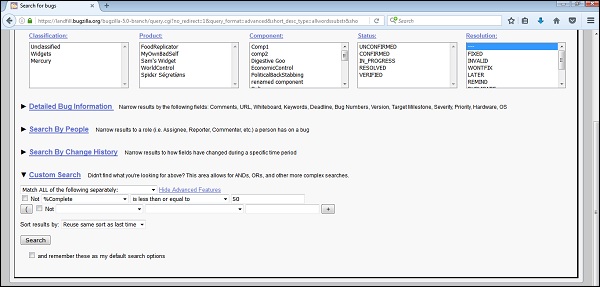
By clicking on Show Advanced features, more capabilities or features appear to use complex and specific search. The user can negate any row by checking a checkbox. It can also group lines of the search with parentheses to determine how different search terms are related. The user gets the choice of combining them using ALL (i.e. AND) or ANY (i.e. OR).
Bugzilla - Bug Lists
A bug list is a group of searched bugs based on the user input. A Bug list is nothing other than filtered bugs based on different conditions in a Standard Search or an Advanced Search.
The format of the list is configurable. For example, it can be sorted by clicking the column headings. Other useful features can be accessed using the links at the bottom of the list, which are −
- Long Format
- XML (icon)
- CSV (icon)
- Feed (icon)
- iCalendar (icon)
- Change Columns
- Change Several Bugs At Once
- Send Mail to Bug Assignees
- Edit Search
- Remember Search as
All of these features have been explained in detail below.
Long Format
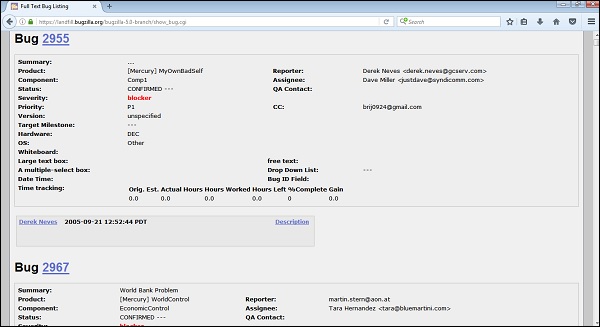
By clicking on the Long Format button, it provides a large page with a non-editable summary of the fields of each bug.
XML (icon)
By clicking on XML (icon), it converts the bug list displayed in table format as an XML format.
CSV (icon)
It converts the bug list as comma-separated values, which can be imported into a spreadsheet or an excel sheet.
Feed (icon)
It displays the bug list as an Atom Feed. The user can Copy this link into their favourite feed reader. To limit the number of bugs in the feed, add a limit=n parameter to the URL.
If the user is using Firefox, get an option as save the list as a live bookmark by clicking the live bookmark icon in the status bar as shown in the screenshot below.
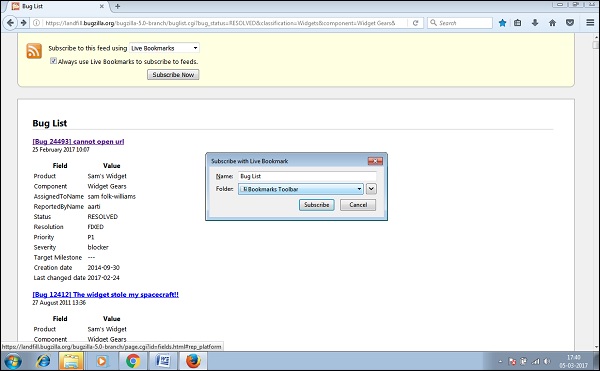
To limit the number of bugs in the feed, add a limit=n parameter to the URL.
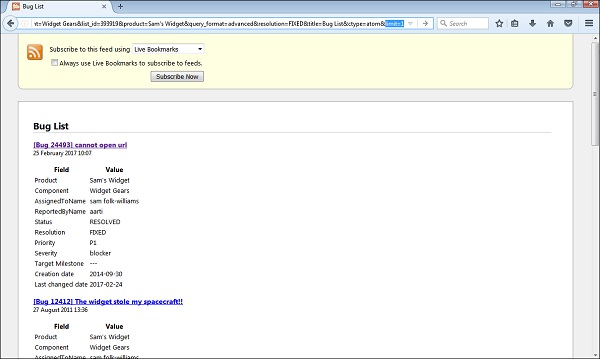
Only the first bug is displayed as a Feed.
iCalendar (icon)
It displays the bug list as an iCalendar file. Each bug is represented as a to–do item in the imported calendar. It is supported in Outlook only. The user can access this feature only if Outlook is configured in the system.
Change Columns
It changes the bug attributes that appear in the list. The user can customize the view of a Bug List using this option. By clicking on the Change Columns button, the following page displays the user selection.
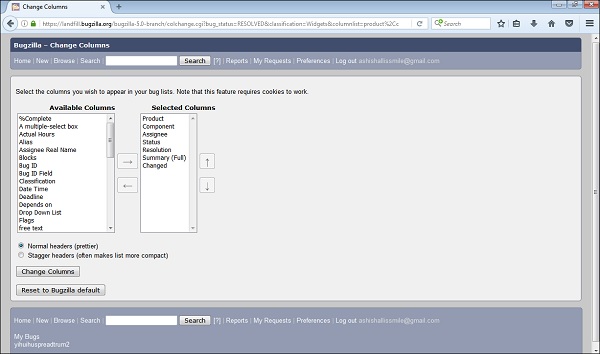
The User can select one or multiple columns from the Available Columns section. These should display in the bug list. Then click on → (right arrow) to show this selection in the Selected Columns section.
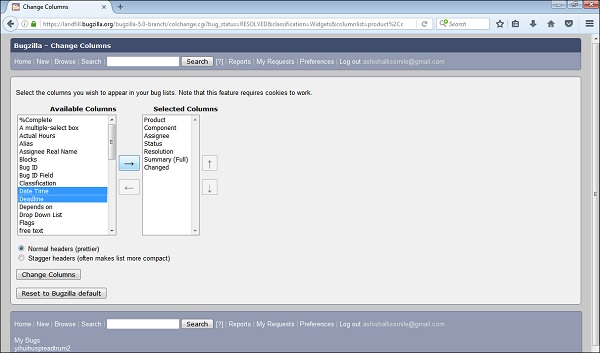
Similarly, the user can deselect any of the columns from the selected columns and click on the ← (left arrow).
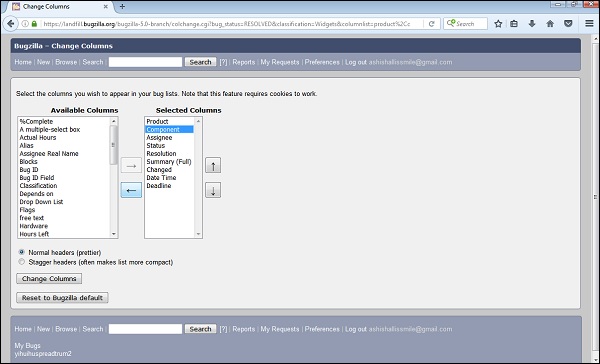
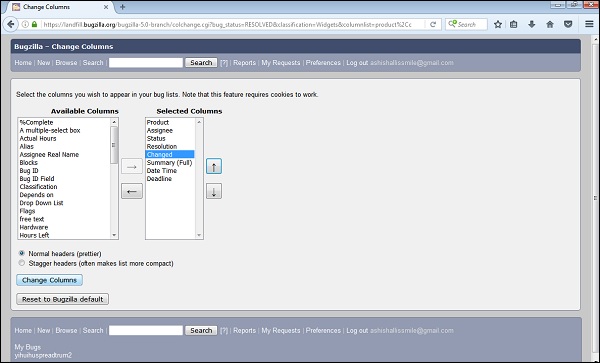
The user can change the appearing order of the columns as well by clicking on move up and down arrow at the right hand side of the Selected Columns section.
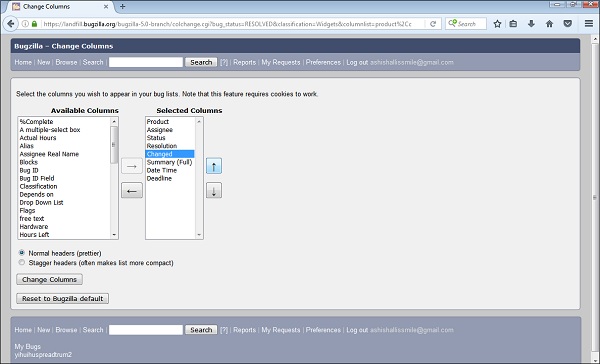
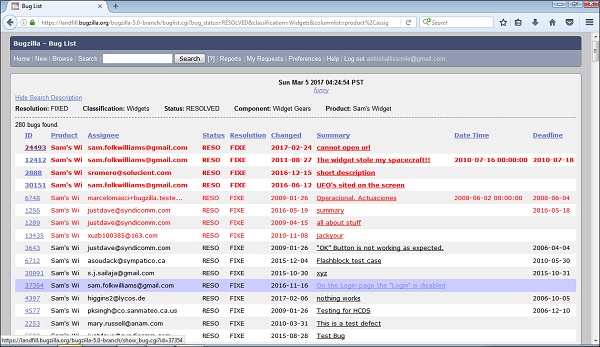
By clicking on the Change Columns button, the bug list will be customized. Else, if the user clicks on the Reset to Bugzilla Default, it will change back to the Default settings.
Change Several Bugs at Once
If an account is sufficiently empowered and more than one bug appears in the bug list, Change Several Bugs At Once is displayed and easily makes the same change to all the bugs in the list – for example, changing their Priority.

Send Mail to Bug Assignees
If more than one bug appears in the bug list and there are at least two different bug assignees, this link is displayed. By clicking on this link, Outlook opens, if it is configured or it asks to configure the Outlook to send a mail to the assignees of all bugs on the list.
Edit Search
If the user did not get the exact results he were looking for, the user can return to the Search page through this link and make small revisions to the search parameters to get accurate results.
Remember Search As
The user can give the Search, a name and remember it; a link will appear in the page footer giving quick access to run it again later.
Bugzilla - Preferences
Preferences in Bugzilla are used to customize the default settings of Bugzilla as per requirement and guidelines. It can also be called as User Preferences.
There are two ways to navigate on Preferences −
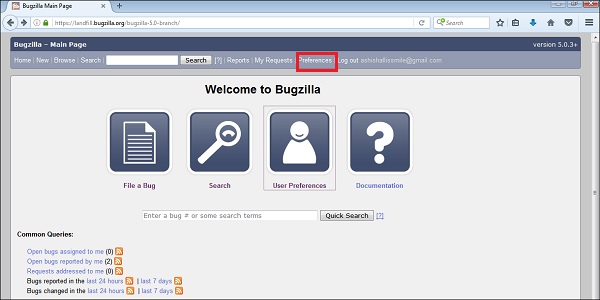
The first way is to click on the Preferences hyperlink in the header of the homepage.
The second way is to click on the User Preferences button, which is displayed on the Welcome Page Icons.
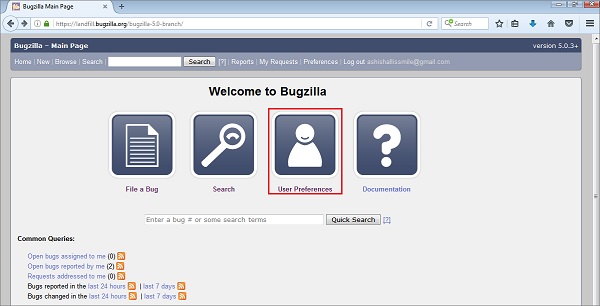
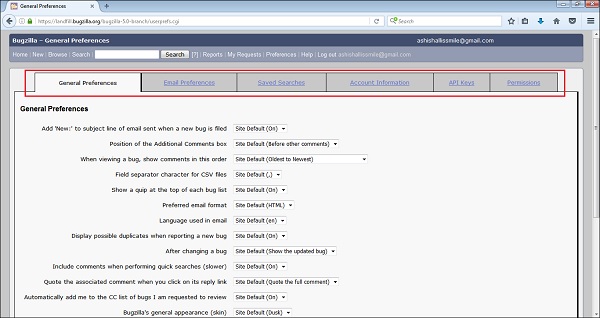
By clicking on one of the links outlined (in red color) in the following screenshot, they will display different types of Preference that can be customized by the users.
Preferences Type
Bugzilla supports the following six types of User Preferences.
- General Preferences
- Email Preferences
- Saved Searches
- Account Information
- API Keys
- Permissions
In the next chapter, we will discuss regarding the General Preferences of Bugzilla.
Bugzilla - General Preferences
General Preferences allows changing several default settings of Bugzilla. Administrators have the power to remove preferences from this list, so the user may not see all the preferences available.
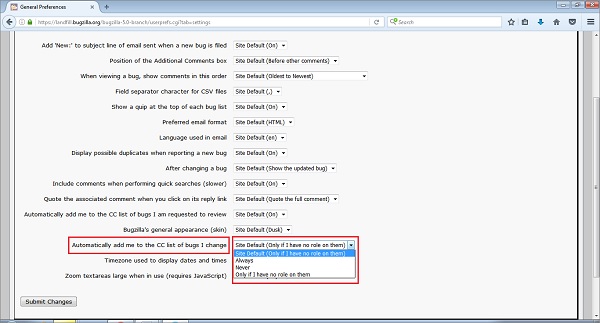
To navigate to General Preferences, click on Preferences or User Preferences from the Homepage of Bugzilla. By Default, the General Preferences tab opens with different preferences as shown in the screenshot below.
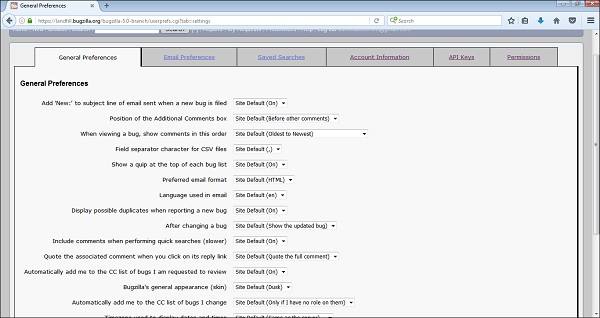
Each preference is very straightforward and self-explanatory. The user can easily understand the field and select the option from the list.
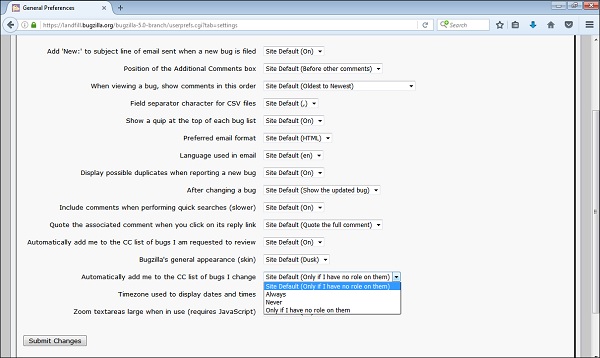
For example – To set “Automatically Add me to CC list of bugs I change”, select Always from dropdown list.
Click on Submit Changes button, which is at the bottom left hand side of the page.
A successful message will appear that says – “The changes to your general preferences have been saved” as shown in the following screenshot.
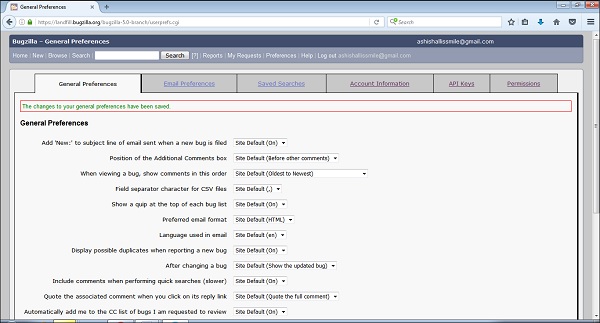
Similarly, other General preferences can be changed simultaneously.
Bugzilla - Email Preferences
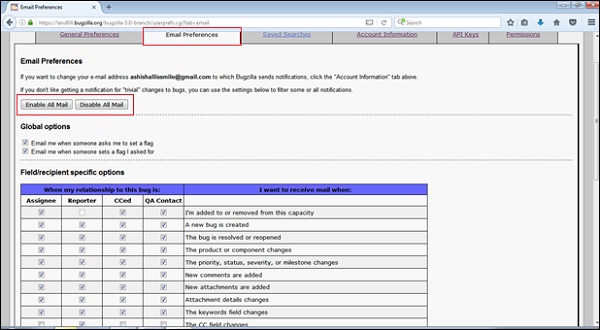
The Email Preferences feature in Bugzilla allows to enable or disable email notifications on specific events. In general, the users have almost complete control over how many emails Bugzilla sends them. If the users want to receive the maximum number of emails possible, click on the Enable All Mailbutton. If the user does not want to receive any email from Bugzilla at all, click on the Disable All Mail button.
To navigate, go to Preferences/User Preferences option on the home screen and click on the Email Preferences tab.
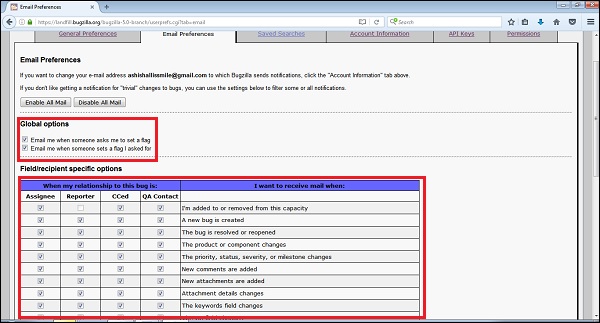
Global and Specific Options
There are two Global Options; where the user can check the checkboxes based on their requirement to get emails. These options are −
- Email me when someone asks me to set a flag and
- Email me when someone sets a flag I asked for.
These define how a user wants to receive the bug emails concerning the flags. Their use is quite straightforward: enable the checkboxes, if the user wants Bugzilla to send a mail under either of the above conditions.
Similarly, a user can check the checkboxes for Field/recipient specific options based on “I want to receive mail when”
User Watching Feature
Bugzilla has a feature called as User Watching. When the user enters one or more comma delineated other user accounts (usually email addresses) into the text entry box, the user will receive a copy of all the bug emails those other users are sent. This powerful functionality is very important and useful in case if the developers change projects or users go on a holiday.
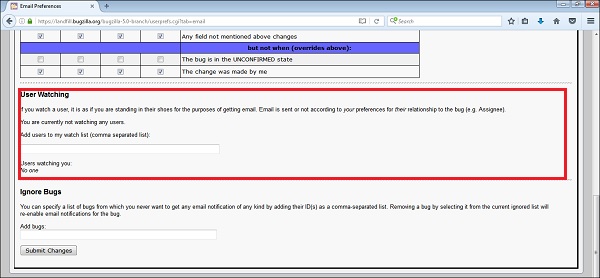
Ignore Bugs Feature
User can mention a list of bugs from those never wants to get any email notification of any kind. For this, user needs to add Bug ID(s) as a comma-separated list. User can remove a bug from the current ignored list at any time and it will re-enable email notifications for the bug. After selections are made, click on the Submit Changes button at the bottom left hand side of the page.

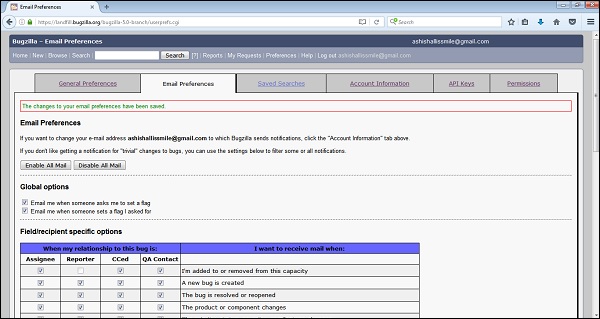
A successful message will display as “The changes to your email preferences have been saved” as shown in the screenshot below.
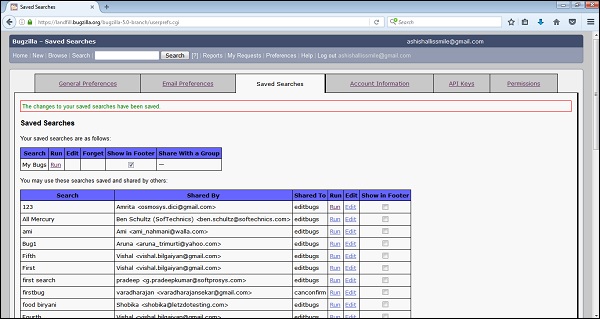
Bugzilla - Saved Searches
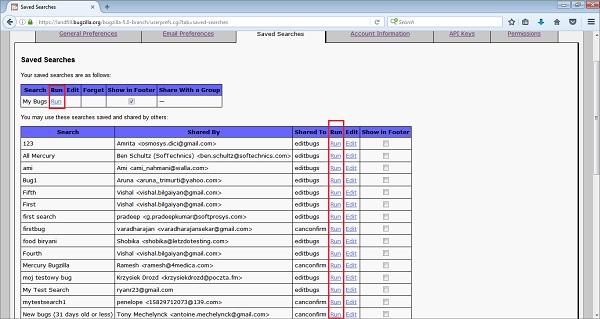
In this Tab, the user can view and run any Saved Searches, which are created by the user as well as any Saved Searches that other members of the group have defined in the querysharegroup.
For the Saved Searches tab, go to Preferences → click on the Saved Searches tab.
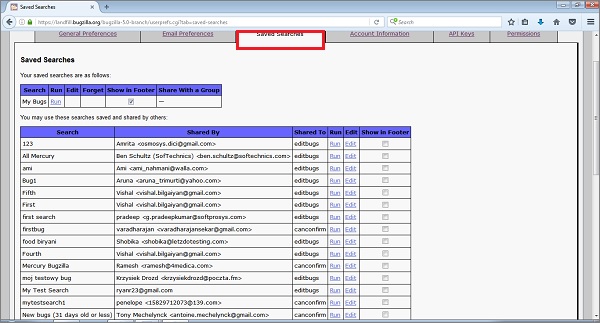
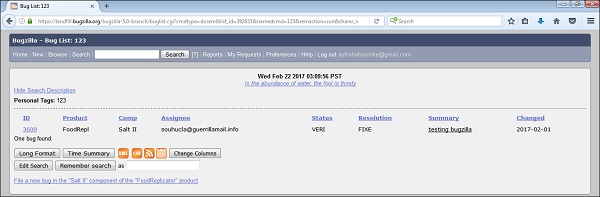
The user can run his bug from the Saved Searches by clicking on the RUN command as highlighted in the following screenshot.
After you click on RUN, the bug list page displays as shown below −
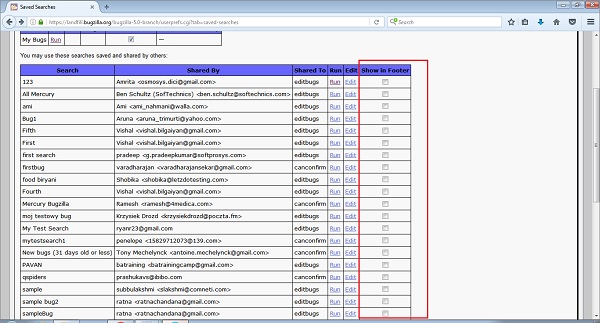
Add Saved Searches to Page Footer
Saved Searches can be added to the page footer from this screen. If somebody is sharing a Search with a group, the sharer may choose Show in Footer by checking the checkbox of a different Saved Search. Based on the permissions, other members can choose the Show in Footer checkbox.
Once all the changes and selections are made, click on the Submit Changes button, which is on the bottom left hand side of the page.
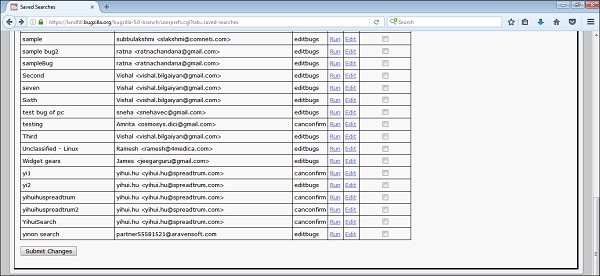
A successful message “The changes to your Saved searches have been saved” will show as seen in the following screenshot.
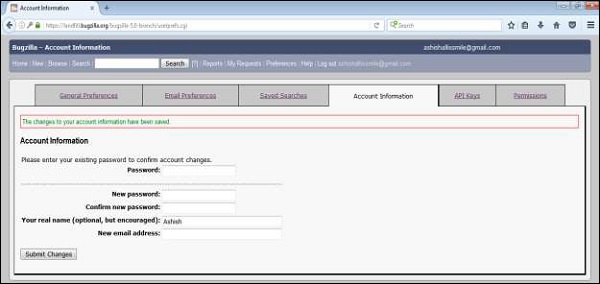
Bugzilla - Account Information
In this Tab, the users can view their account information, which were provided at the time of registration. It also provides a feature where the users can change their password.
Changing the Password
To change the account password, the following entries are required −
- Provide the Current password in the Password text box to verify the account.
- Enter a new password in the field – New password.
- Re-enter the new password in the Confirm new password field.
- A user can change the name in the ‘Your real name (optional, but encouraged)’ field.
- Provide an email address.
Once all entries are made, click on Submit Changes as depicted in the following screenshot.

A successful message is displayed as “The changes to your account information has been saved” as shown in the following screenshot.
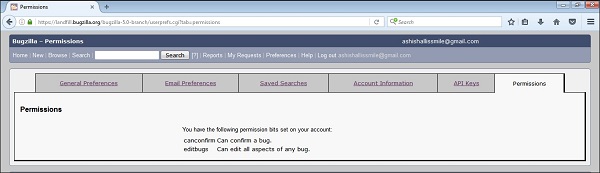
Bugzilla - Permissions
In this Tab, a user can see all the permissions, which are provided by the Admin. The Admin can have all the permissions and based on the role of the user, the admin provides different permissions to various users.
In this case, a user has two permissions −
- canconfirm − can confirm a log.
- editbugs − can edit all aspects of a bug.
Similarly, a user can view different permission names and it has a straightforward explanation to understand.


Comments
Post a Comment