
What is Quality Center?
HP Quality Center (QC), a test management tool, is now popularly known as Application Life Cycle Management (ALM) tool, as it is no longer just a test management tool but it supports various phases of the software development life cycle.
HP-ALM helps us to manage project milestones, deliverables, and resources. It also aids in keeping track of project health, standards that allow Product owners to guage the current status of the product. It is important to understand the history, architecture, and workflow of Quality Center.
History of QC
Quality Center was formerly known as Test Director, a product of Mercury Interactive. The following table provides us a better insight about the version history of QC.
| S.No# | Commercial Name | Version Numbers | Owned By |
|---|---|---|---|
| 1. | Test Director | v1.52 to v8.0 | Mercury Interactive |
| 2. | Quality Center | v8.0 to v9.0 | Mercury Interactive |
| 3. | Quality Center | v9.2 to v10.0 | Hp |
| 4. | ALM | v11.0 to v11.5x | Hp |
Architecture of QC
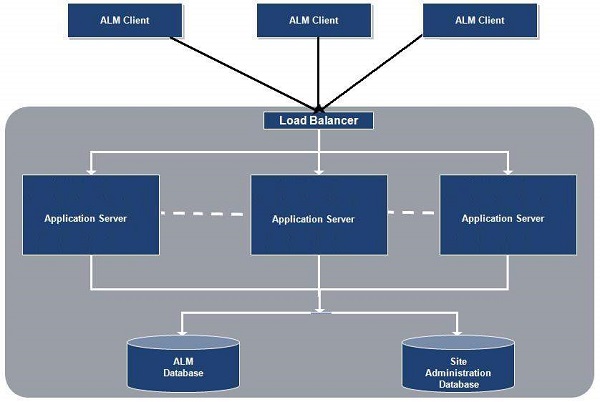
HP-ALM is an enterprise-wide application that is based on Java 2 Enterprise Edition (J2EE) technology and uses MS SQL Server or Oracle as its back end. There is also a load balancer to effectively cater users’ requests.
Site Administration Database is hosted on a standalone database server, while other project related data are stored on a separate database server. The following diagram shows how the setup of QC would be in a large corporation.
HP ALM Editions
HP ALM is a commercial licensed tool and HP deploys it in four different editions that are listed below −
- HP ALM
- HP ALM Essentials
- HP Quality Center Enterprise Edition
- HP ALM Performance Center Edition
ALM Edition Feature Comparison
Each one of the above editions has its own limitation in terms of ALM functionalities. Based on the following table, one can decide which license is required for their project purpose.
| Feature | HP ALM | HP ALM Essentials | HP QC Enterprise Edition | HP ALM Performance Center Edition |
|---|---|---|---|---|
| Release Management | Yes | Yes | Yes | Yes |
| Project Planning and Tracking | Yes | No | No | No |
| Risk Based Quality Management | Yes | No | Yes | No |
| Test Authoring and Execution | Yes | Yes | Yes | Yes |
| Test Resources | Yes | Yes | Yes | Yes |
| Test Configurations | Yes | No | Yes | Yes |
| Hp Sprinter | Yes | No | Yes | No |
| Lab Management | Yes | No | No | Yes |
| Versioning | Yes | No | Yes | Yes |
| Baselining | Yes | No | Yes | Yes |
| Cross Project Customization | Yes | Yes | No | Yes |
| Sharing Defects | Yes | No | No | No |
Quality Center Workflow
The following diagram shows the workflow of Quality Center −

Hp-Quality Center - Environmental Set up
Hp-Quality Center Setup
HP Quality Center Environment Setup is a complicated process and it is NOT the usual installation that we carry out on a Windows operating system.
Enterprise installation would be distributed, however for learning/evaluating purpose, one can install the trial version of HP-ALM 11.5x on a standalone server. One should also need to take care of the prerequisites carefully to carry out a successful installation.
Prerequisites for Installing QC
For evaluation purpose, both client and server can reside on the same system and in this chapter, we will do the installation of that kind.
Supported Windows Operating Systems
Only the following list of Windows OS are supported, hence one has to ensure that HPALM is installed on one of the following Windows OS only −
- Microsoft Windows Server 2008 Enterprise SP2 32 Bit/64 Bit
- Microsoft Windows Server 2008 R2 Enterprise SP1 64 Bit
- Microsoft Windows Server 2012 Standard 64 Bit
- Microsoft Windows Server 2012 R2 Standard 64 Bit
Supported Databases
Ensure that you have one of the following databases installed in your system before proceeding to install HP-ALM−
- Oracle 10.2.0.5
- Oracle 11.2.0.3
- Oracle 11.2.0.4
- Microsoft SQL Server 2005 SP4
- Microsoft SQL Server 2008 R2 SP1
- Microsoft SQL Server 2008 R2 SP2
Supported AppServers
Ensure that the server has got any of the following AppServers installed −
- Apache 2.2
- Microsoft IIS 7.0
- Microsoft IIS 7.5
- Microsoft IIS 8.0
- Microsoft IIS 8.5
Supported Browsers
HP ALM can be accessed only by using Active X based browsers, hence Internet Explorer is the only browser that is supported −
- Microsoft Internet Explorer 8
- Microsoft Internet Explorer 9
- Microsoft Internet Explorer 10
- Microsoft Internet Explorer 11
Downloading Hp-ALM
Following are the steps for downloading the 30-day trial version of HP-ALM from HP website.
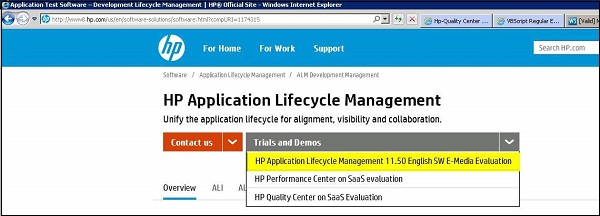
Step 1 − Launch the following URL - http://www8.hp.com/us/en/software-solutions/software.html?compURI=1174315
Step 2 − Click on "Trials and Demos" and Select "HP Application LifeCycle Management 11.50 English SW E-Media Evaluation" as shown below −
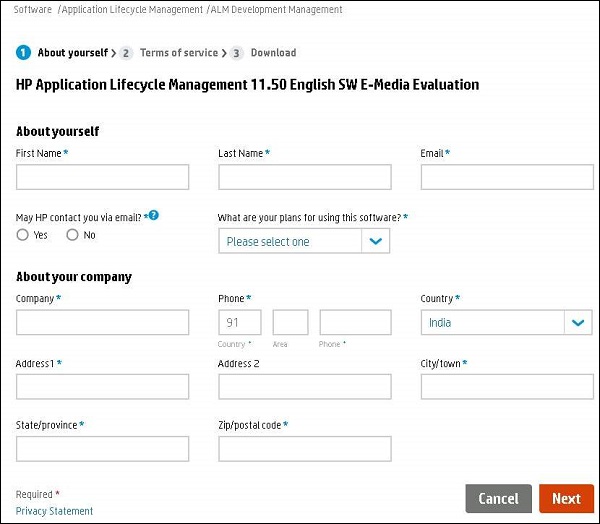
Step 3 − Fill in all the necessary details and click on "NEXT" as shown below −
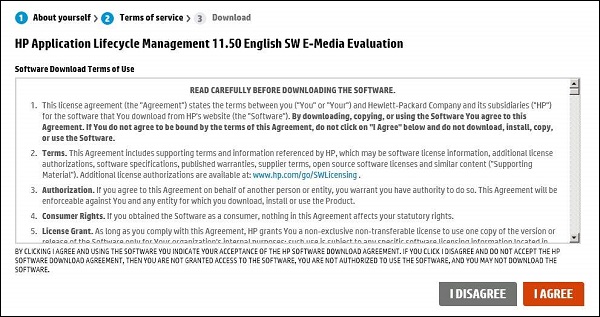
Step 4 − Accept the Software terms and click on "NEXT" as shown below
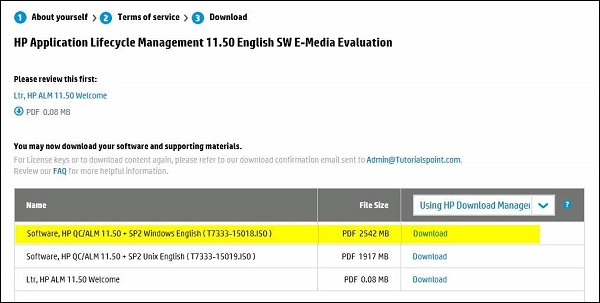
Step 5 − Download link appears and select the appropriate edition you want to install (windows/Unix)
Installing HP-ALM
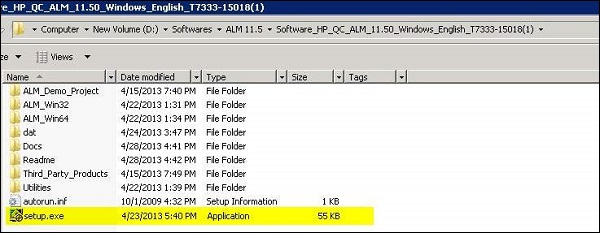
Step 1 − After downloading the ISO file, unzip the contents and after unzipping, the folder structure would be as shown below −
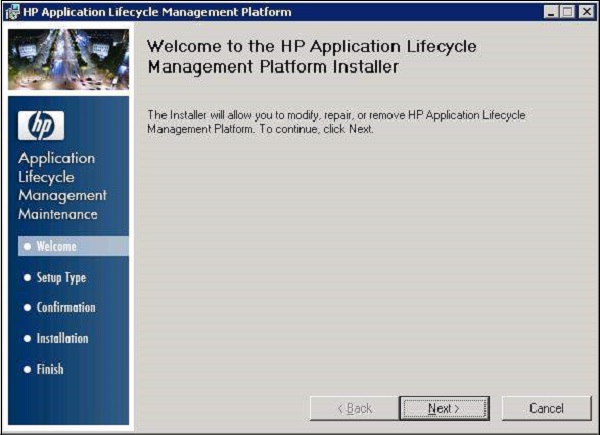
Step 2 − After the Welcome screen opens up, click the "NEXT" button as shown below. Continue to click the Next button until you reach the Finish screen.
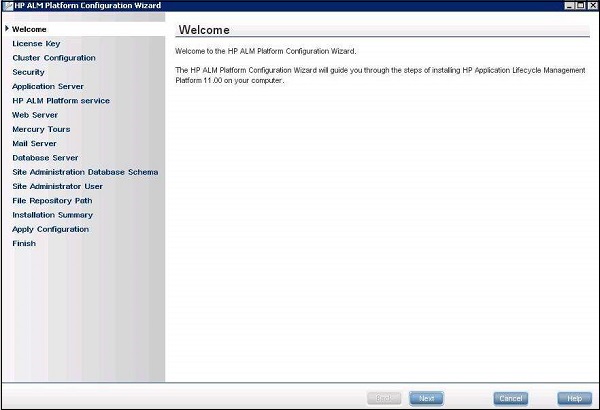
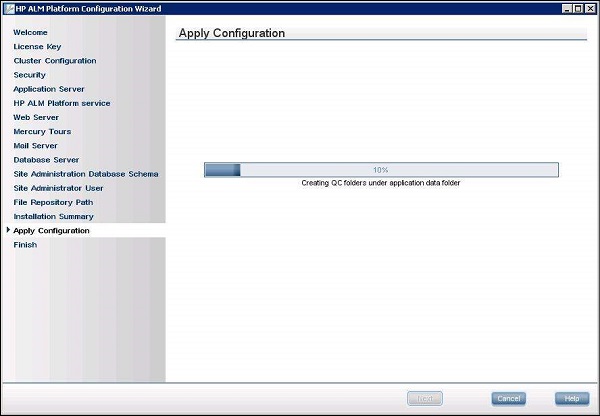
Step 3 − Upon finishing, the HP ALM Platform Configuration Wizard opens as shown below.
Step 4 − License Key Tab opens and the user needs to select "Application Life Cycle Management" so that we can access all the features of the package.

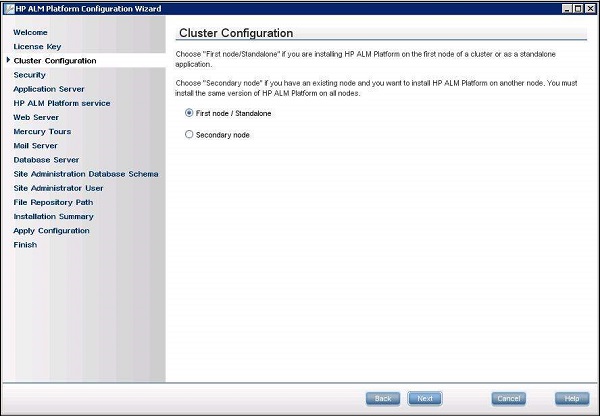
Step 5 − Cluster Configuration Tab opens and choose Standalone, as we will install all services in a standalone host and NOT as a distributed system.
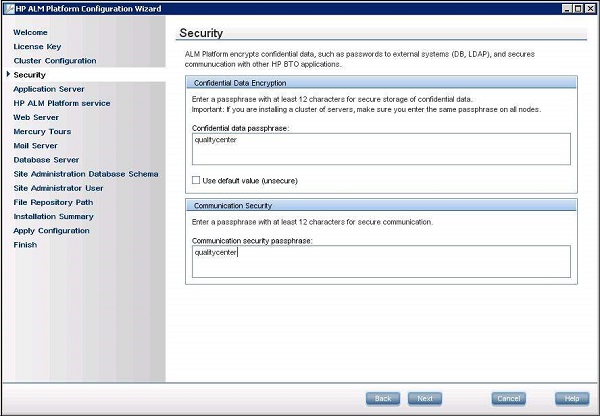
Step 6 − Security Tab opens. Here you need to key-in the passphrase such that there is a minimum of 12 characters.
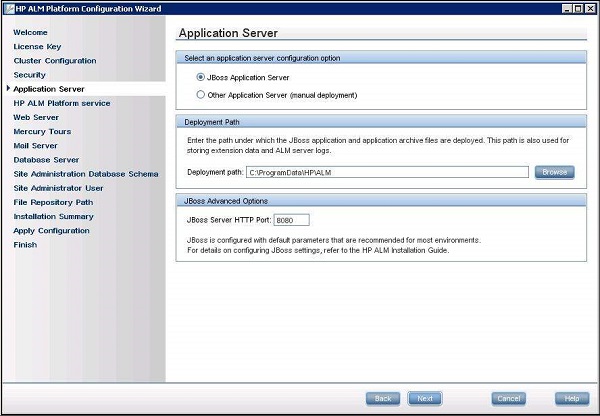
Step 7 − Application Server Tab opens. Choose "Jboss Application Server" and allow all others as default values.
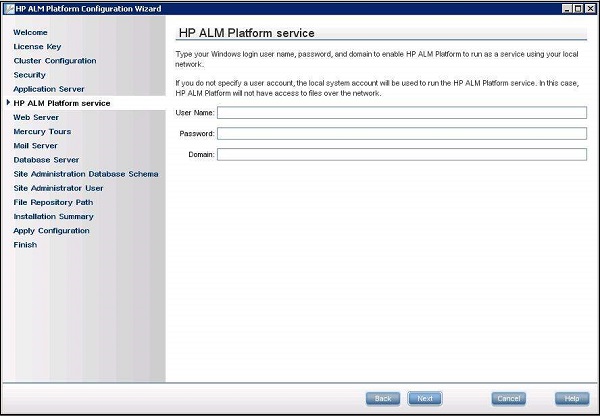
Step 8 − HP ALM Platform Service tab opens. Leave it empty so that your Windows login is used as the userid for starting the ALM Services.
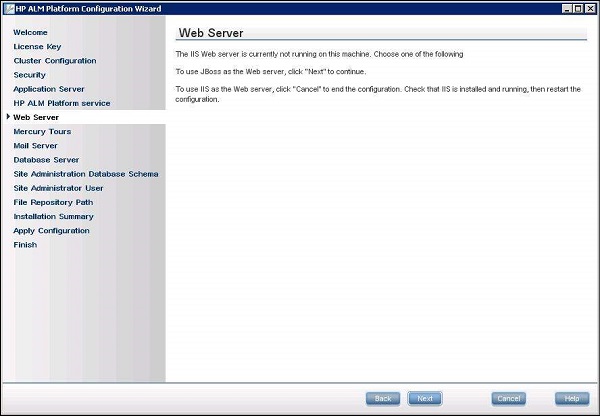
Step 9 − Web Server selection window opens. We will use JBOSS as the Webserver. Hence we need NOT select anything but just click on the "NEXT" button.
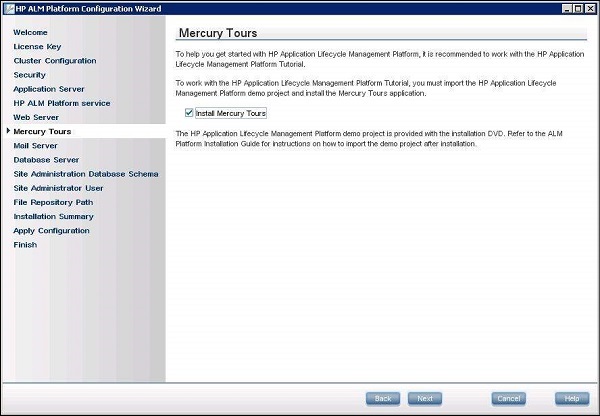
Step 10 − If you would like to install the sample application "Mercury Tours", please select and click "NEXT".
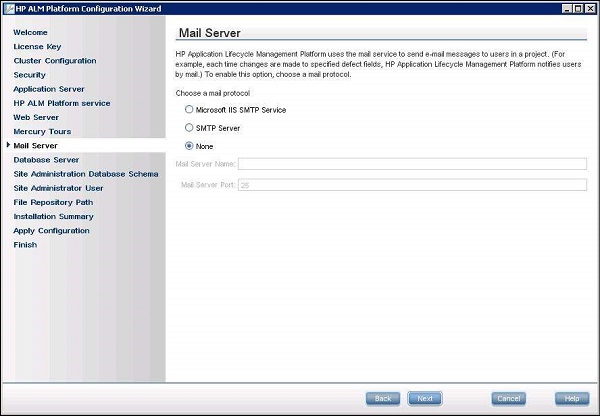
Step 11 − For Mail Server Configuration, add your SMTP or MS IIS SMTP server name or Select None and Click "NEXT". This server setting will enable you to interact with other QC users via Email or it triggers an email based on the settings.
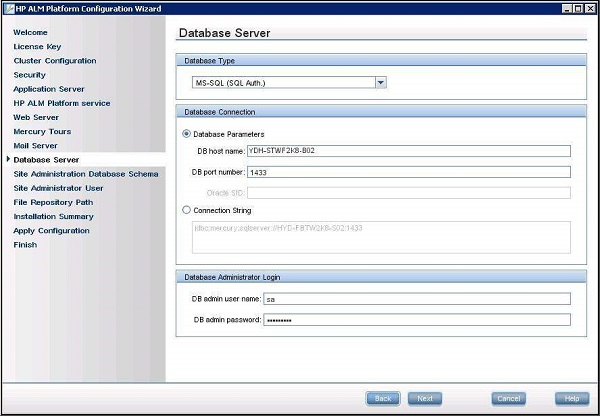
Step 12 − Choose the correct database Server Configuration. Please note that the database corresponds to the one that is already installed on the server. The user credentials should have privileges to create Database on the server. Only if all the field values are correct, it moves on to the next screen.
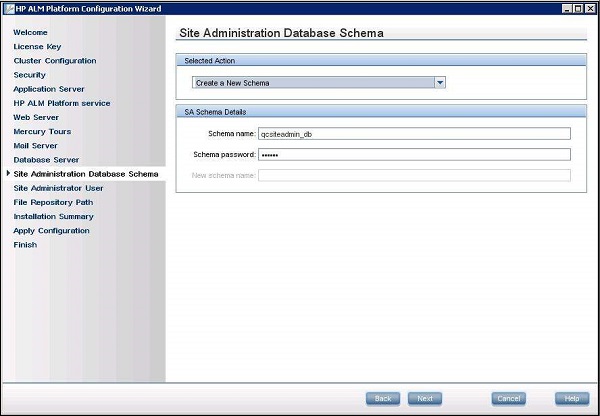
Step 13 − The Site Administration Database Schema configuration window Opens. Ensure that you give a unique DB Schema name where all the Admin data of QC will be stored.
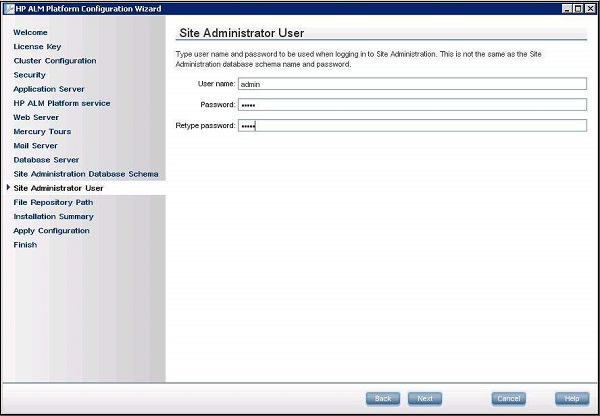
Step 14 − Enter the Site Administrator user credentials. Do NOT forget to remember these credentials so that you can log into QC using these credentials after successful installation.
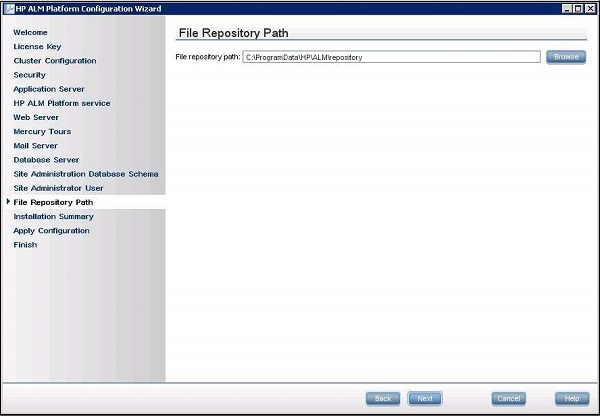
Step 15 − File Repository Path is the location where all the QC related assets which we create would be saved.
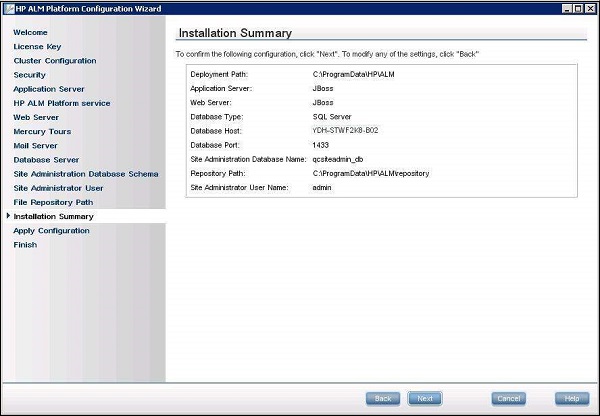
Step 16 − The Installation Summary Window opens up which shows the complete summary of the selected configuration. If the user wishes to make any changes, then he can do so by going back to the previous window.
Step 17 − Apply Configuration shows that the selected components will be installed with the selected configuration. Upon Completion the message is thrown to the user if the installation is successful.
Launching HP-ALM
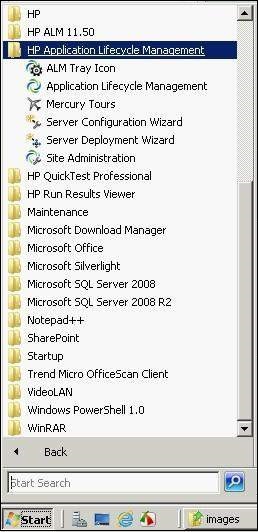
Step 1 − Upon installing HP-ALM successfully, the ALM can be launched from the Start menu as shown below.
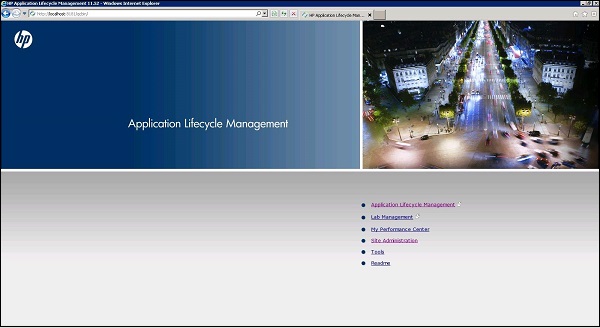
Step 2 − After installation, we can also launch ALM by typing the following URL in Internet. Explorer − http://localhost:8181/qcbin/
ALM would open as shown below.
Hp-QC - Server Side Configurations
Once the HP-ALM is installed, we can continue to work with ALM only after creating domain, project, and users. In this chapter, we will discuss how to create Project, Domain and Users.
Creating Domain
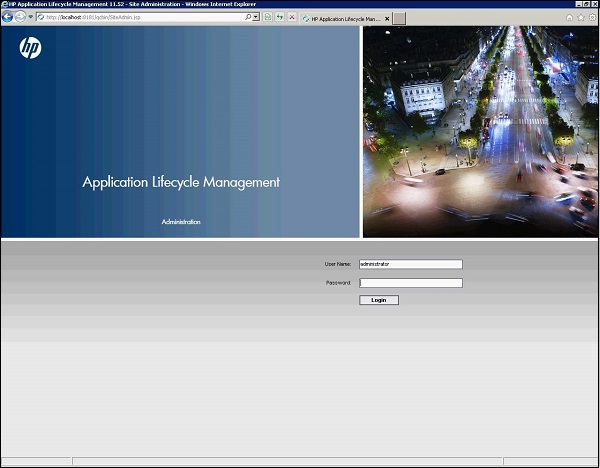
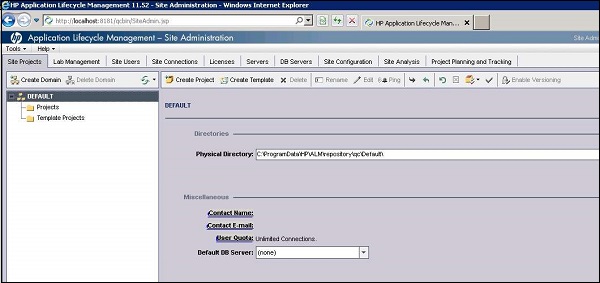
Step 1 − For creating a Domain, the first step is to get into Site Administrator Page. Launch QC using the URL - http://localhost:8181/qcbin/SiteAdmin.jsp and enter the Admin credentials that was set up while installing QC.
Step 2 − After logging into Site Admin page, we will land in Site Projects Tab as shown below. The next step from there is to create a Domain.
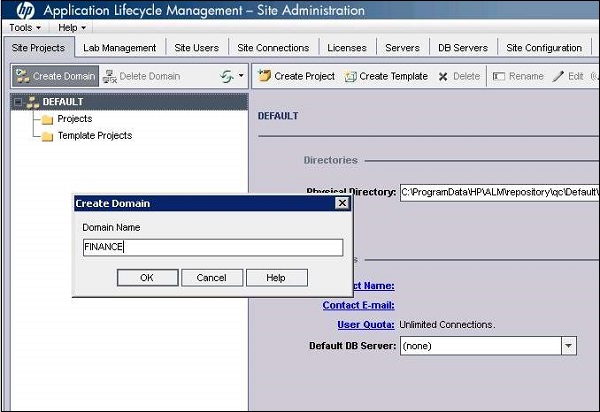
Step 3 − Click the 'Create Domain' button on the top-left corner. Enter Domain Name and click OK.
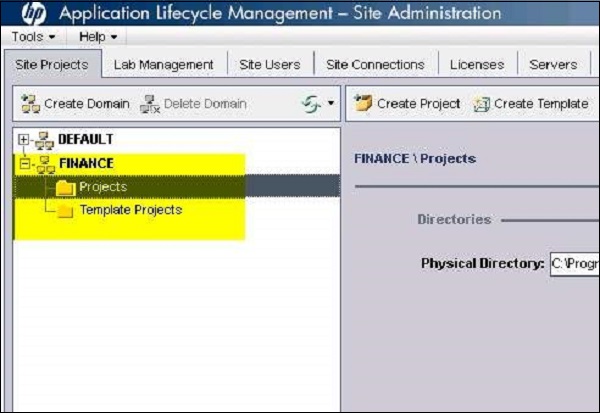
Step 4 − Domain would be created as shown below.
Creating Projects
Once a Domain is created, the next step is to create 'Projects'. Creating a Project takes us through a wizard and one should follow the steps given below to create 'Projects'
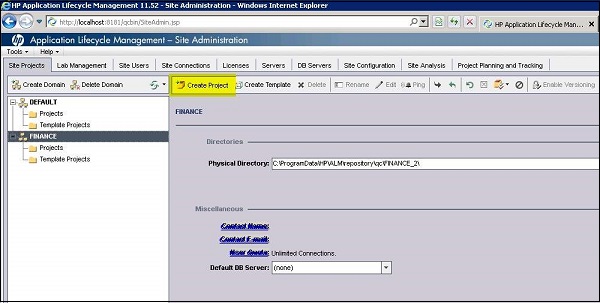
Step 1 − Select the Domain under which the project needs to be created and then click the "Create Projects" button as shown below.
Step 2 − The Create Project Wizard opens. Select "Create an Empty Project" and click "Next".

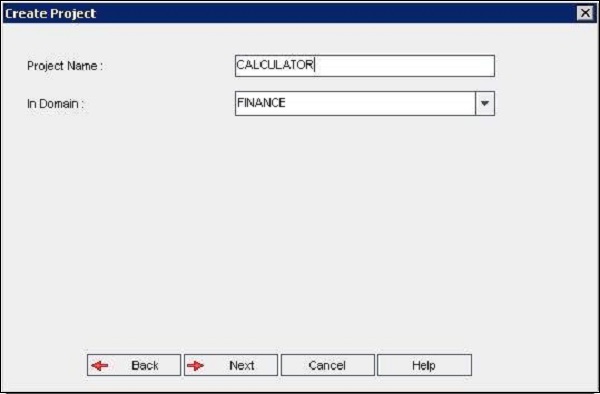
Step 3 − Enter the "Project Name" and select Domain and click "Next".
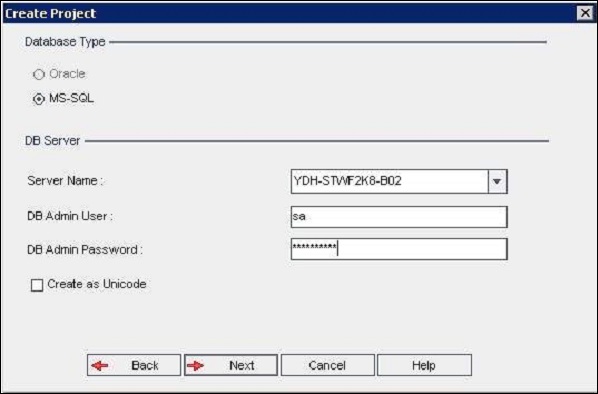
Step 4 − Enter the Database credentials and click "NEXT".
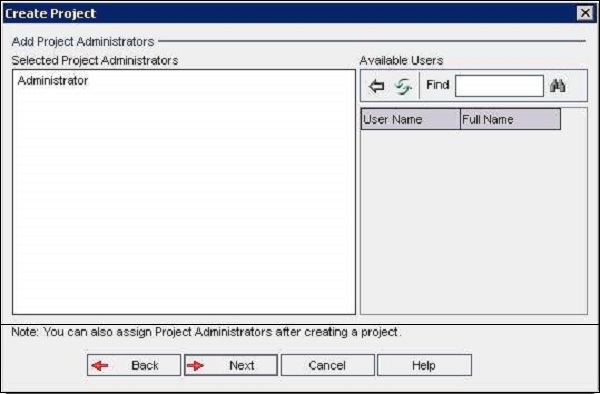
Step 5 − Select the Project Administrator user ID and click "NEXT".
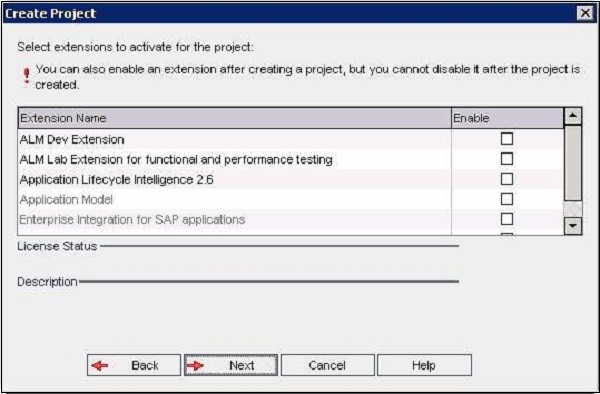
Step 6 − Select the extensions to activate the project and click "NEXT".
Step 7 − Check the Activate checkbox and enable Version controlling (if you want) and click "NEXT".
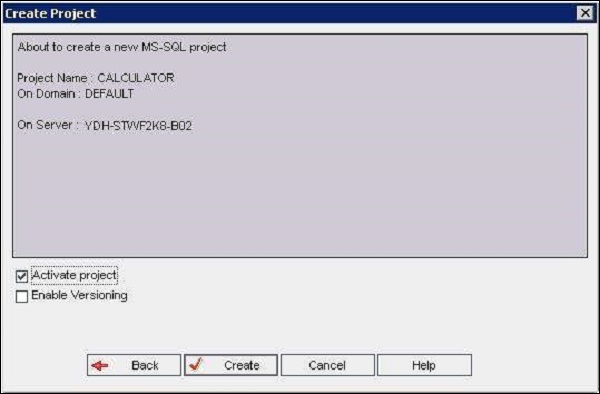
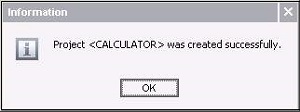
Step 8 − Upon clicking "Next", the project "Calculator" is created successfully. Click "OK" to see the created project in the Project Pane.
Creating Users
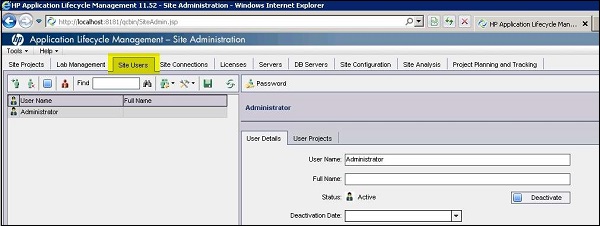
Step 1 − Select the Site Users Tab in "Site Admin" Page as shown below and click the "Add New User" button.
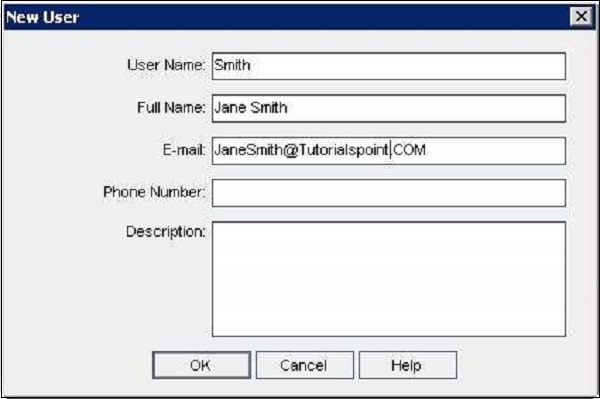
Step 2 − The New User window opens up. Fill the user details and click "OK".
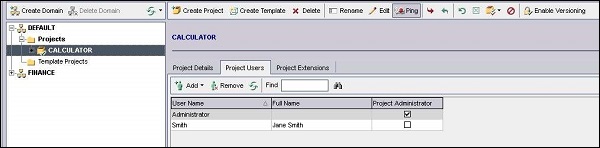
Step 3 − After Creating the user, give the user the project access that they need.
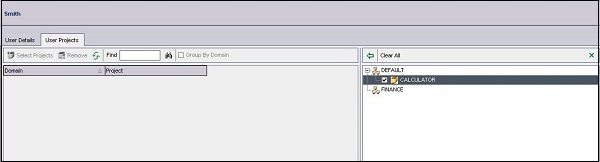
Step 4 − Verify the user list in "Project Users" Tab after giving the user the access to the project.
Quality Center - Common Functionalities
HP Application Lifecycle Management (ALM) displays data in infragistics grid view or in a tree structure and users can manipulate the data in various ways, such as rearranging columns, filtering, sorting, and grouping.
One can also attach files to those grid records, search for specific text in records, and view history of various entities. The following features are to be understood to ensure that users are able to work with Quality Center seamlessly.
Click on each one of these links to know more about the common functionalities.
| S.No. | Common Functionality & Description |
|---|---|
| 1 | Filter Dialog Box
Enables user to perform filter ALM data based on defined criteria.
|
| 2 | Users Dialog Box
Enables users to choose a user name from the list of users.
|
| 3 | Find Dialog Box
Enables users to search for a particular record in a tree view or grid view.
|
| 4 | Replace Dialog Box
Enables user to find and replace a specific field value in a tree or grid.
|
| 5 | History Tab
Enables user to view a list of changes made to the currently selected work item.
|
| 6 | Send Email Dialog
Enables quality center users to send an email about the details of an entity to other users.
|
| 7 | Attachments Dialog
Enables users to add and manage attachments to a specific record.
|
| 8 | Snapshot Dialog
Enables users to capture and attach screenshot of your application under test to an entity in ALM.
|
| 9 | Column chooser Dialog
Allows users to select the columns that they wish to see in the grid view.
|
| 10 | Set Defaults Dialog
Enables users to set default values for certain fields in ALM.
|
| 11 | Alerts and Flags Dialog
Enables users to view a list of alerts for a selected record and also allows them to create, view, and modify a follow up flag to remind themselves to follow up on an issue
|
| 12 | Favorites Dialog
Allows user to create and organize favorites.
|
Quality Center - Management
Management Tab
This area helps us to create and manage releases and cycles. It also helps us make project planning and tracking. Management tab helps us to work with the following areas in ALM −
- Creating Releases
- Creating Cycles
- Release Scope and Milestone
- Master Plan and Status
- Libraries
- Baselining
Releases
Creating Releases is the first step in Quality Center. All the work item such as libraries, test execution, and defects are tracked based on the release.
Before creating a release, one can create a container/folder for the same by clicking the new folder icon as shown below.

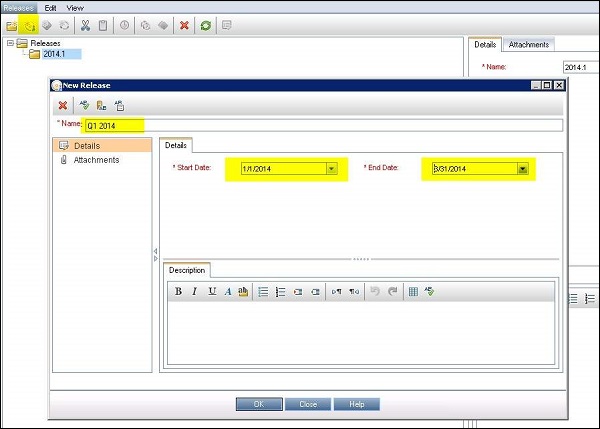
Click the New Releases button and the New Release dialog opens. Enter the name of the release and click OK. The Release will be created as shown below.
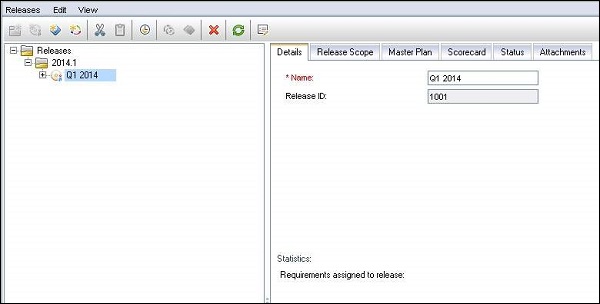
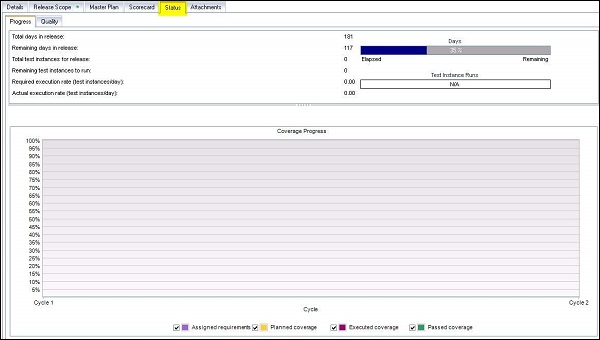
Upon selecting the created release, one can notice that the tabs - Details, release scope, master plan, scorecard, status and attachments are generated.
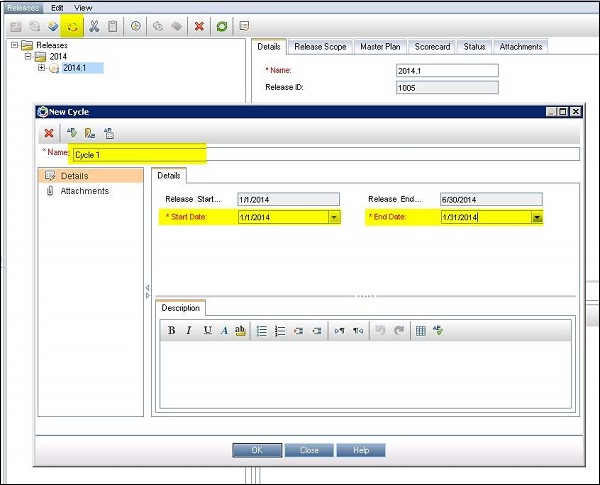
Cycles
Each release is further divided into cycles. Let us see how to create cycles in Quality Center.
Select the Release under which one would like to create cycles. Click the New Cycles button and the New Cycles dialog opens as shown below. Users have to enter the start date and the end date of the cycle. Users can create as many cycles as they can under a release.
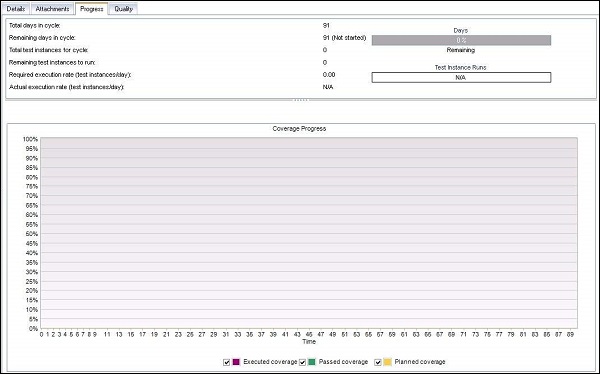
Under Cycle, one can see the progress and Quality. The Progress is shown in a pictorial representation
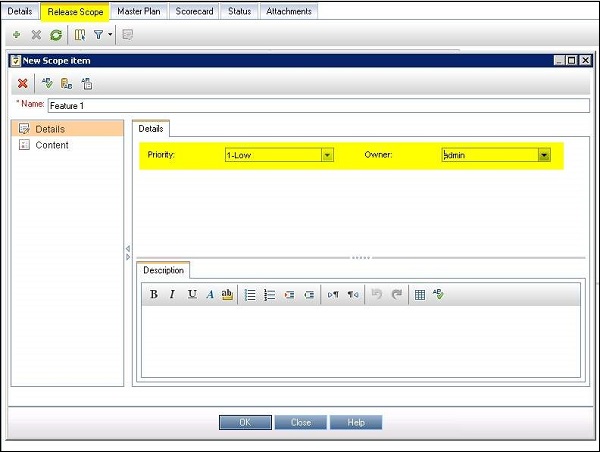
Release Scope and Milestone
Each Release has a scope and scope can be added under "Release Scope" tab under Releases as shown below.
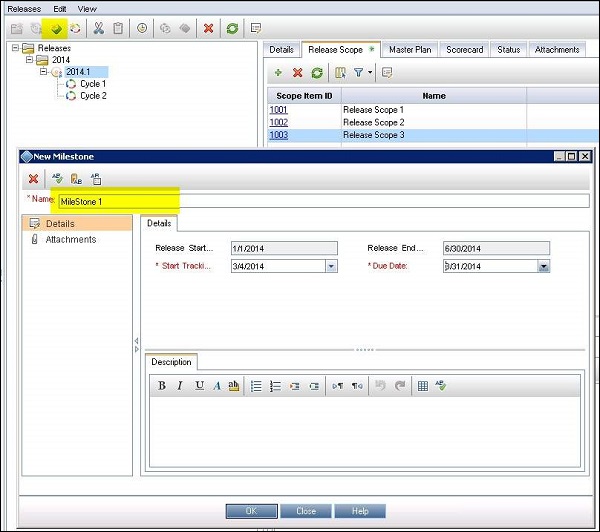
Each Release has also a milestone associated with it and can be added using the Milestone icon under Releases module as shown below.
Master Plan and Status
Master plan can be accessed under "Releases" tab which displays the cycles and milestone timelines as shown below.

Status shows the pictorial representation of the progress and Quality.
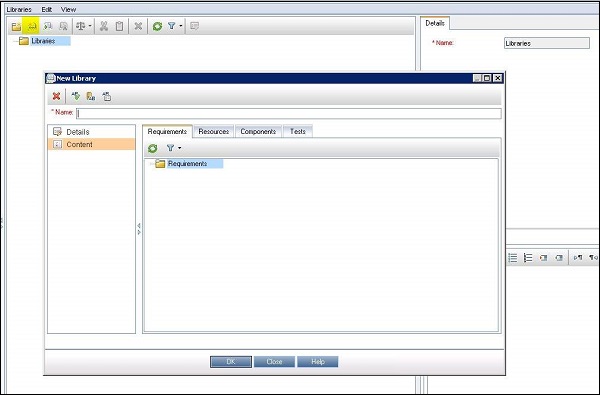
Libraries
A library represents a set of entities in a project and the relationships between them which consists of requirements, tests, test resources, and business components.
A New Library can be created by clicking the "New Library" icon in the Library Navigation bar. A new window would be as shown below and one can name the library and add resources such as requirements, test plan, and components.
Baseline
Once Libraries are created, the libraries can be baselined which is a snapshot of the library at a specific point in time. Users can compare baselines at any stage of the development phase. A baseline includes all the entities defined in the library, including requirements, tests, and test resources.
A New Baseline can be created by clicking on the New Baseline button under "Libraries" Navigation bar. Users can also compare baselines and export to CSV format.
Quality Center - Requirements
Defining and Capturing Requirements is one of the key criteria for any software development process. Describing Requirements refers to what needs to be done to meet the objectives during development. Establishing requirements clearly and correctly upfront is very much emphasized so that there would be minimal/no rework after UAT.
The Requirements module enables users to define, manage and track requirements at all stages of the software lifecycle. The following are the key functionalities in Requirements module. Click on each link to know more about them.
| S.No. | Functionality & Description |
|---|---|
| 1 | Creating Requirements
Create requirements, assign to releases/cycles.
|
| 2 | Uploading Requirement
Uploading requirements using ALM-MS Excel Addins.
|
| 3 | Requirement Traceability
Enables how to define traceability links between requirements and dependencies that exist between the requirements.
|
| 4 | Traceability Matrix
Enables user to view the traceability matrix that lists source requirements and their associated requirements and tests.
|
Quality Center - Test Plan
The crucial step in testing any application is developing a clear and a precise test plan. A good test plan enables the team to assess the quality of the application under test at any point in the software development life cycle.
Following functionalities are very important in order to understand in the test plan module better. Click on each one of the functionalities to know more about it.
| S.No. | Functionality & Description |
|---|---|
| 1 | Creating Tests
This module describes how to create folders of test subjects in the test plan tree and also to add tests.
|
| 2 | Uploading Tests
Uploading Tests using ALM-MS Excel Addins.
|
| 3 | Requirement and Test Coverage
Enables how to define the relationship between the requirements and tests.
|
| 4 | Test Configuration
Specifies the subset of data or a run-time environment that the test should use.
|
Quality Center - Test Lab
This module helps the testers to execute the created tests. One can schedule, run and analyze, post defects using this module.
The Following functionalities in Test Lab module helps us to understand test lab module in depth.
| S.No. | Functionality & Description |
|---|---|
| 1 | Creating Test Set
This functionality describes how to create and define test sets in the Test Lab module.
|
| 2 | Test Run Schedules
Helps the testers to control the execution of test instances in a test set.
|
| 3 | Test Execution
Enables testers to execute the test/test set.
|
| 4 | Test Results
This Functionality enables testers to analyze the test results.
|
Quality Center - QC-QTP Integration
In this section, we are going to learn how to integrate QTP and QC. By Integrating, the QTP automation scripts can be executed right from Quality Center. For establishing a connection, first step is to install the required Addins. We will understand how to integrate by taking a sample QTP script and execute it from QC.
Step 1 − Navigate to ALM home page and click on "Tools" from the list of links.
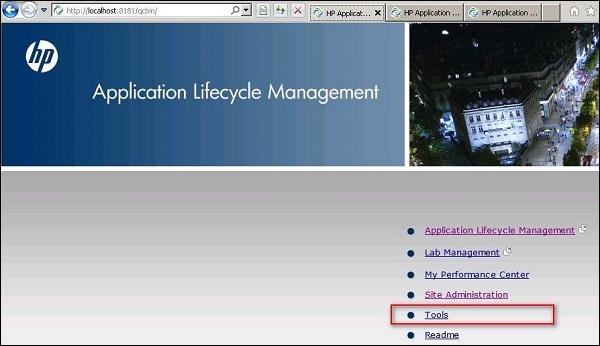
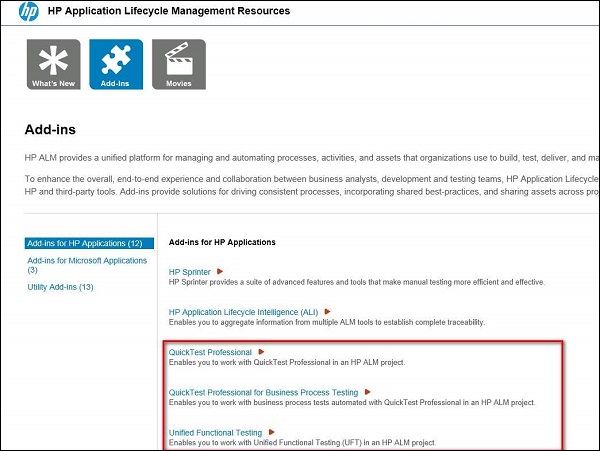
Step 2 − Click on "More HP ALM Addins" Link from the addins page as shown below.
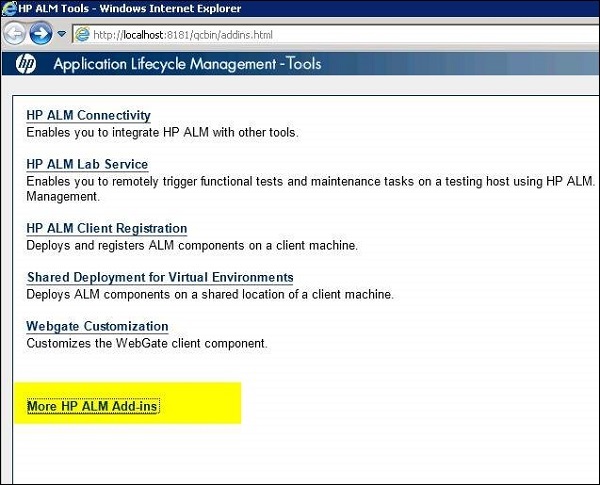
Step 3 − In the Addins page, select "Addins for HP applications" and choose "Quick Test Professional". In case of "Unified Functional testing" (UFT), choose the options appropriately and install the addins. The Installation is similar to HP-MS Office Addins.
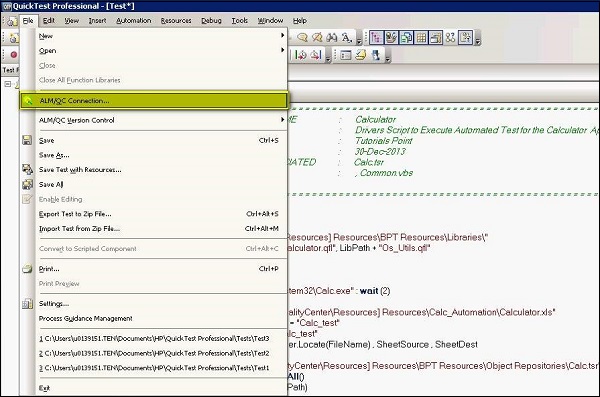
Step 4 − Establish a connection between QTP and QC by Navigating to "File" >> "ALM/QC Connection".
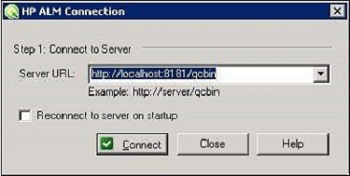
Step 5 − HP ALM Connection dialog opens. Enter the Server URL as shown in the below example.
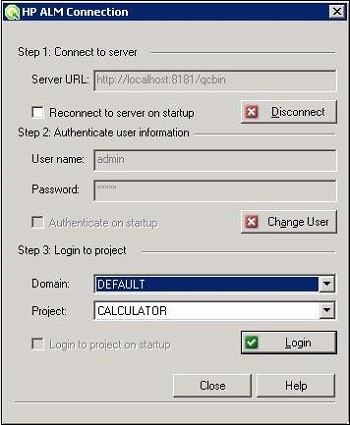
Step 6 − Once the URL is correct, the credentials dialog opens. Tester has to connect to the relevant project area.
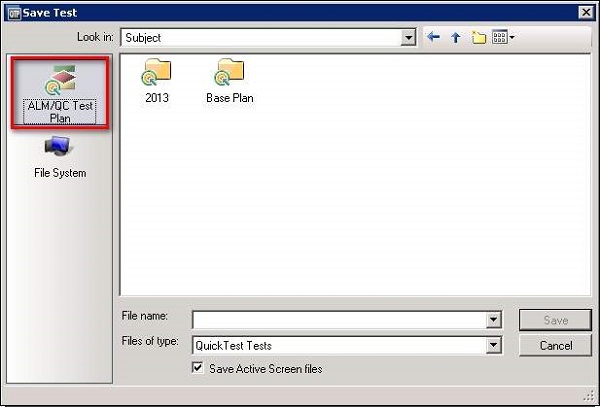
Step 7 − Once ALM Connection is successful, we need to save the Driver Script in Quality Center. Select ALM/QC Plan as shown below.
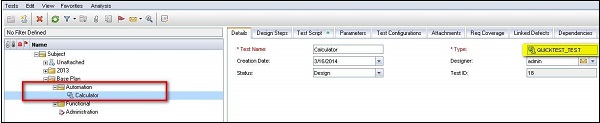
Step 8 − Once the test is saved, we can see the in ALM where the test type is shown as "Quick Test".
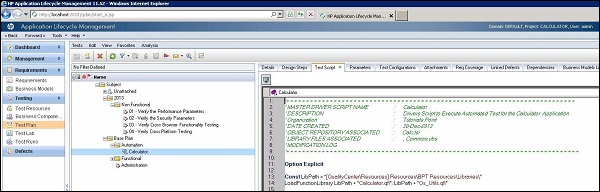
Step 9 − Upon Navigating to "Test Script" Tab which appears only if the test type is of "Quick Test", The script shown in QTP screen would be displayed in Quality Center as well.
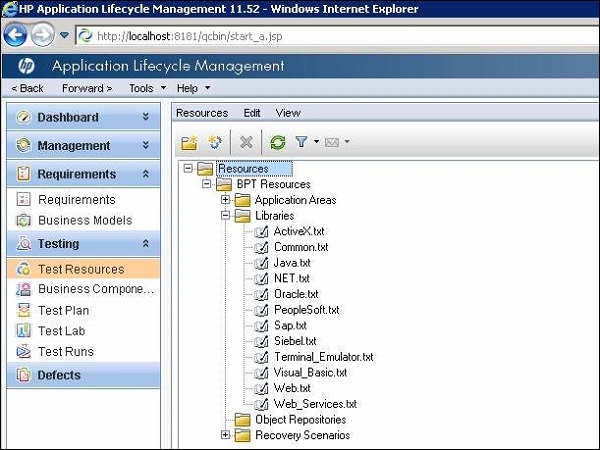
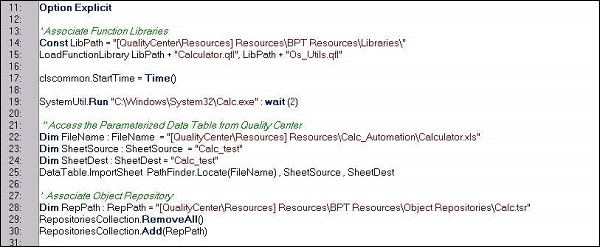
Step 10 − The other necessary component that is required for script execution is Library files which can be placed under "Test Resources" Folder.
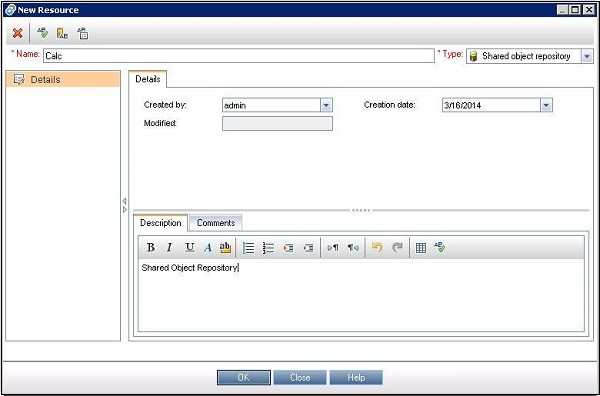
Step 11 − The Function Library file can be added by creating a new resource of type ".qfl" or ".vbs".
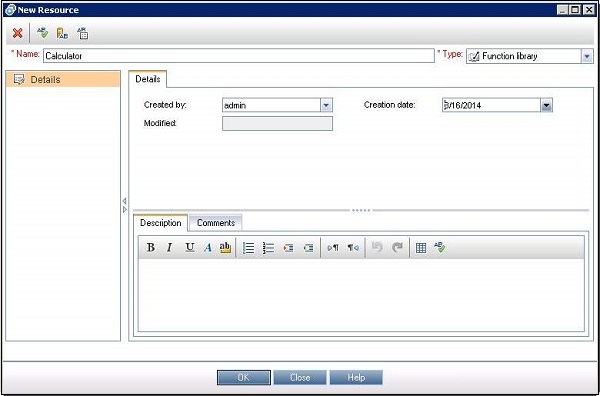
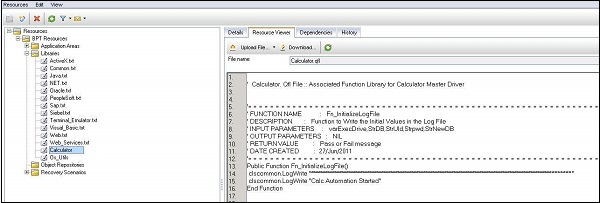
Step 12 − The Added library file can be accessed in quality Center using resource Viewer.
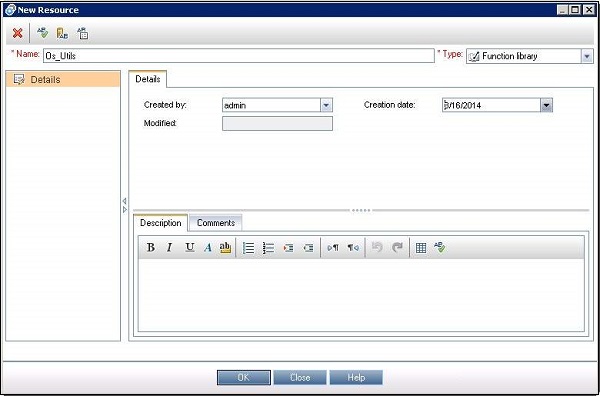
Step 13 − If there are more library files, the same is added by creating a new resource of type ".qfl" or ".vbs".
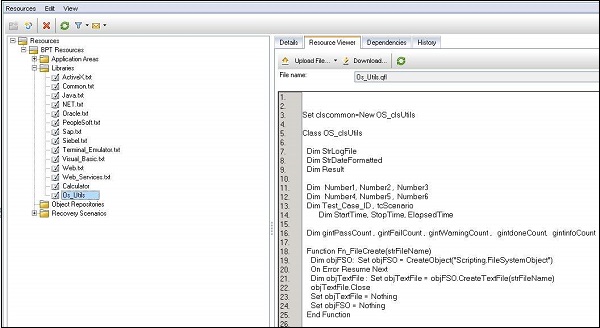
Step 14 − Once again, Added library file can be accessed in quality Center using resource Viewer.
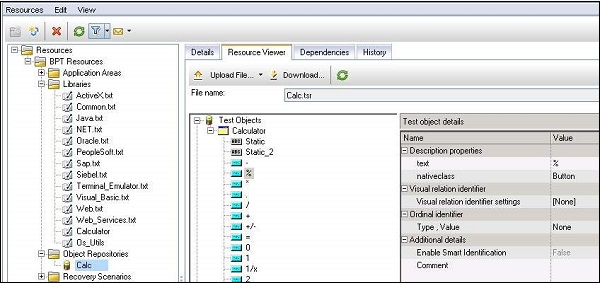
Step 15 − The Next dependent component for any script execution is "Object Repository" which is again placed under "Resources" section
Step 16 − The added Object Repository and its properties can be viewed using "Resource Viewer".
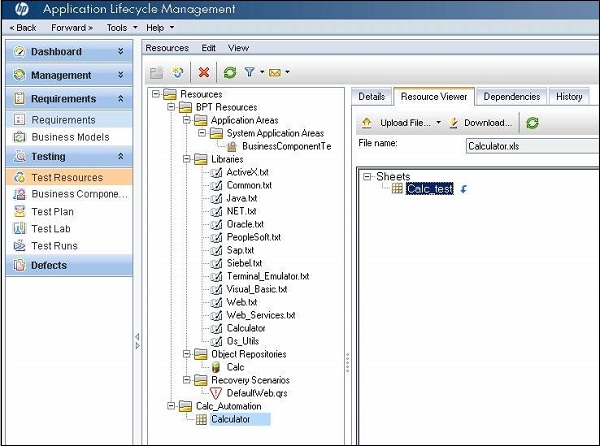
Step 17 − The Datatable, parameterized data setup also be placed in Quality Center under "Test Resources" section.
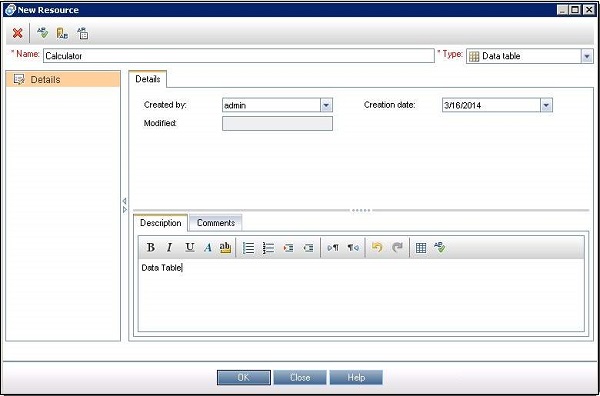
Step 18 − The added data Table can be viewed using in "Resource Viewer"
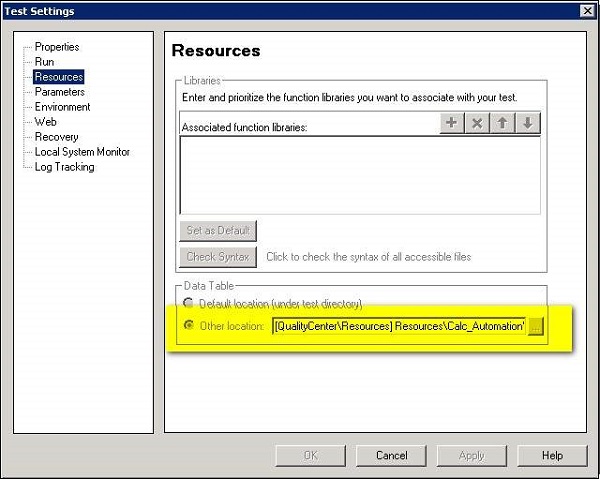
Step 19 − The Datatable should now also be mapped to the test settings so that they can be picked while execution. The same can be done using "Settings" of "File" Menu.
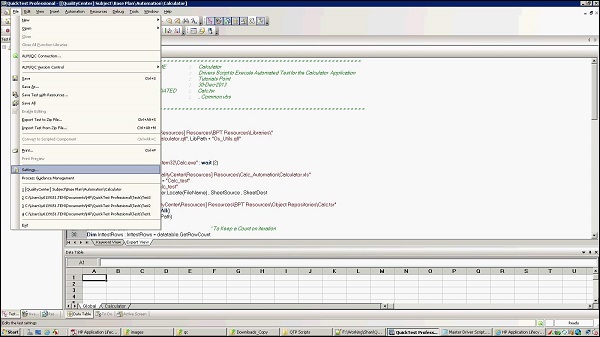
Step 20 − The Test Settings dialog opens. Navigate to Resources Tab and select the Datatable that we added in Step 16.
Step 21 − Now we can access those test resources that are uploaded in Quality Center in QTP script as shown below. The Libraries files and Object Repositories are bound dynamically.
Step 22 − Now, we should allow QTP to interact with other HP Products. This will allow QTP to interact with Quality Center. Go to "Tools" >> "Options"
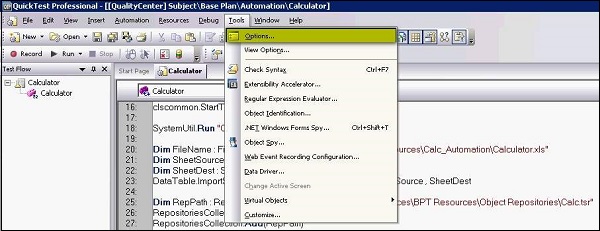
Step 23 − Now, enable "Allow other HP products to run tests and components" as shown below.

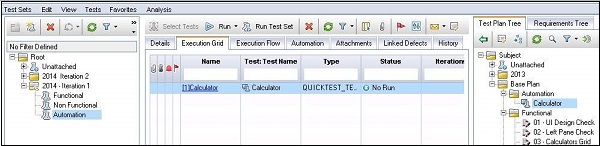
Step 24 − The Next Step is to add the test in "Test Lab" and execute the test. The Procedure to Add tests into Test Lab remains the same as that of manual tests.
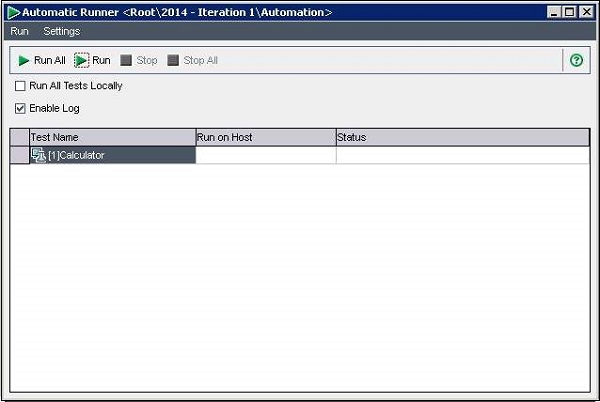
Step 25 − Upon clicking on "Run", the automatic runner opens and enable "Run all tests locally" and hit "Run".
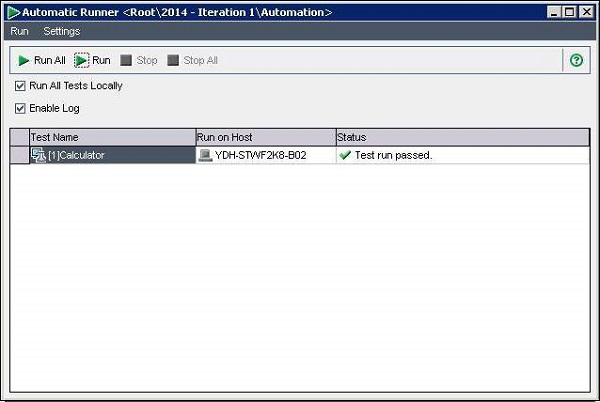
Step 26 − Once execution is complete, the test result is displayed on the same "Automatic Runner" dialog.
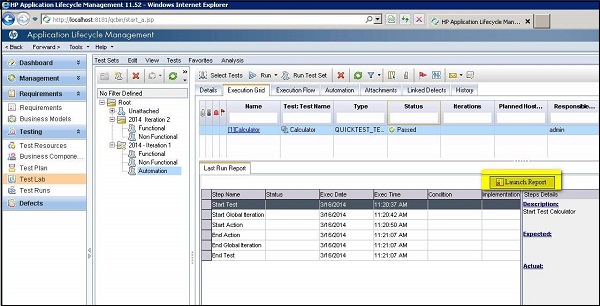
Step 27 − In Test Lab QTP report is loaded automatically. User can click on "Launch report" to get to know about more details of the execution.
Quality Center - Defects
During test execution, when the expected result does not match with the actual result, a defect should be logged. Now Let us focus various functionalities associated with defects.
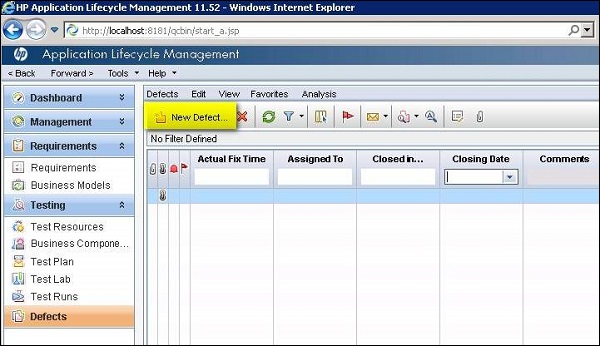
Navigate to defects Tab in Quality Center and Click on "New Defects".
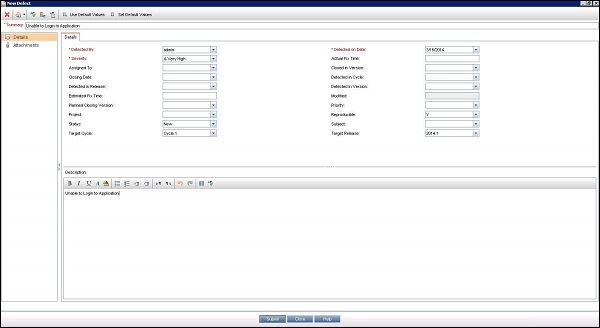
Fill in the mandatory parameters such as defect summary, detected by, Severity and Description.
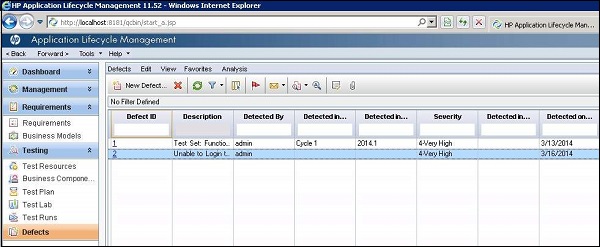
Once a defect is posted, the same be accessed in Defects Tab as shown below.
If the defects are logged during the test execution the step and description would be autopopulated from test case where as If a defect is logged by clicking on "New Defect" in defect module the steps, description and summary needs to be entered manually by the user.
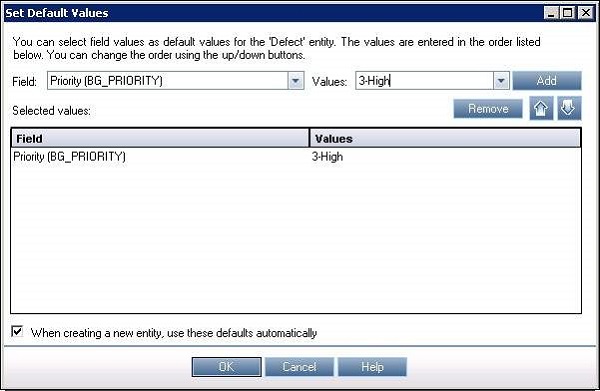
Many a times testers will NOT be in a position to enter all field values in "New Defect" Window. Instead they can make use of "Set Default Values" Option. It can be accessed from "New Defect" Window as shown below.
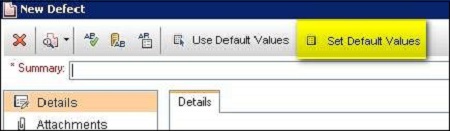
The "Set Default Values" dialog opens. We will be able to set a default value for each one of the fields in "Defects" Section which would be prepopulated once we click on "New Defect" button. We can also add/remove Default values using the appropriate button in this dialog box.
Defects can also be uploaded from Excel to Quality Center and the procedure remains the same as that of uploading "Requirements" and "Test Cases" using HP-MS Excel plugin utility.
All the defects are displayed by default, hence the user has to use filter functionalities to display only those that are filtered by user.
Quality Center - Dashboard Analysis
Dashboard Tab contains "Analysis View" and "Dashboard View" enabling user to analyze and display ALM data in various formats. Let us understand the importance of each one of them in detail.
- Analysis View − It Contains the analysis tree using which project managers/QA can organize all of their analysis items which can be any one of the following viz. graphs, project reports, and Excel reports.
- Dashboard View − It Contains the dashboard tree in which managers/testers organize dashboard pages that can arrange multiple graphs that was created in the analysis tree, and display them in a single view.
Analysis View
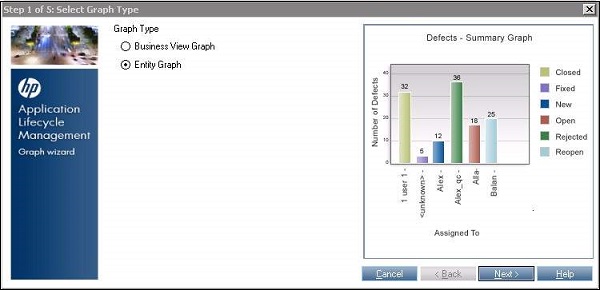
Step 1 − Go to "Analysis View" and click on "+" button and select "Graph wizard". The "Graph Wizard" dialog opens.

Step 2 − Select "Entity Graph" and click "Next" as shown below.
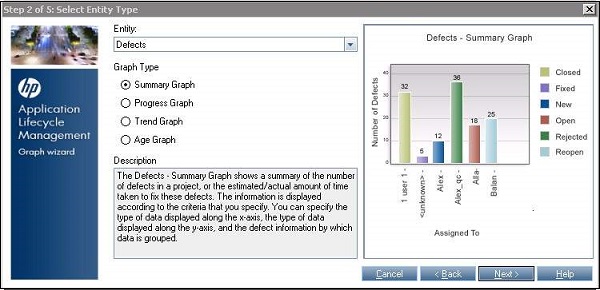
Step 3 − Select the kind of Entity(Defects, Test Case, runs, Test Configuration) against which the graph needs to be generated.
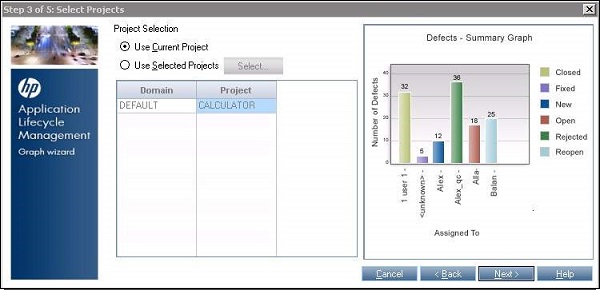
Step 4 − One can choose all projects that they have got access to or they can choose just the current project.
Step 5 − One can filter based on release/cycle and ensure that only the relevant data is displayed.
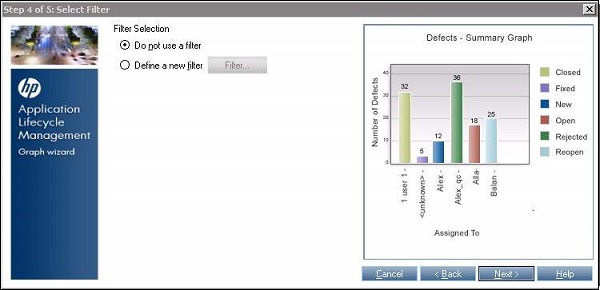
Step 6 − We can also "group by" based on a particular field and choose what needs to be mapped against X-Axis.
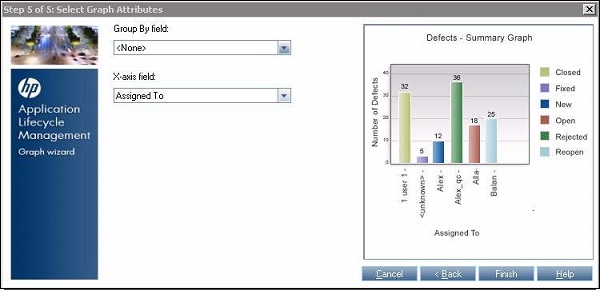
Step 7 − Once the Finish button is clicked, the graph is generated based on the user’s choice/settings.
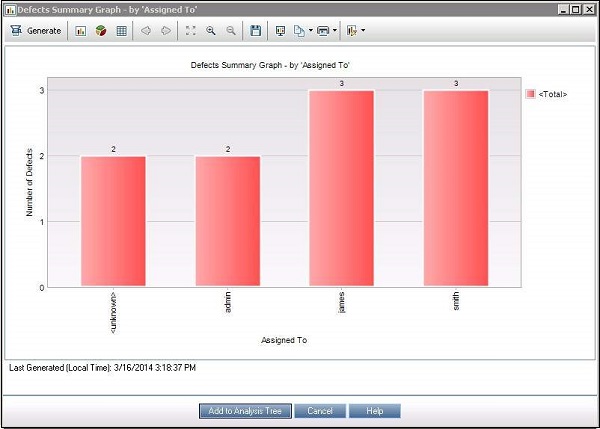
Step 8 − The generated graph can be named and saved either as public or private.
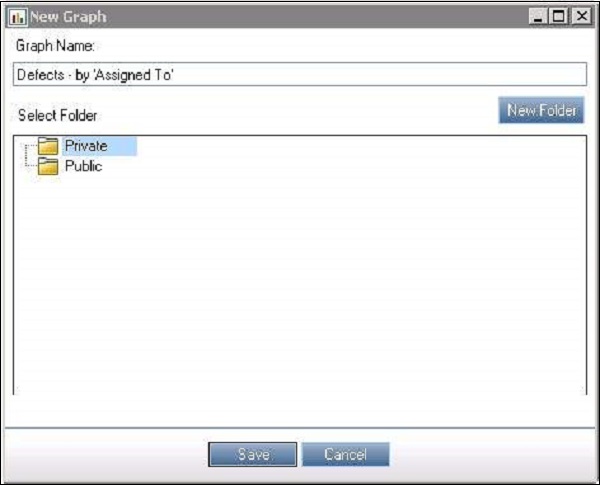
Step 9 : The added graph can now be accessed from "Dashboard" >> "Analysis View".
Dashboard View
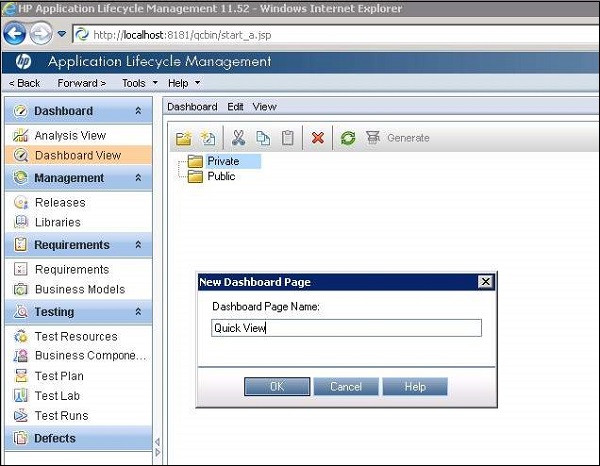
Step 1 − Go to "Dashboard View" and create a "New Folder" if you wish to [or] create a "New Dashboard" page straight away.
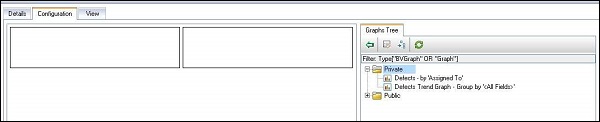
Step 2 − Upon creating a "New Dashboard" Page, various tabs are generated. "Configuration" tab is one of them in which users can add those graphs which can be added to the dashboard.
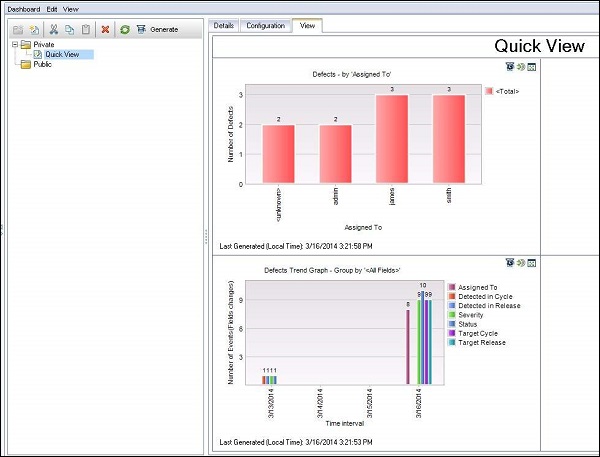
Step 3 − Users should use the "View" tab to view the added dashboard and hit refresh to get the latest data.
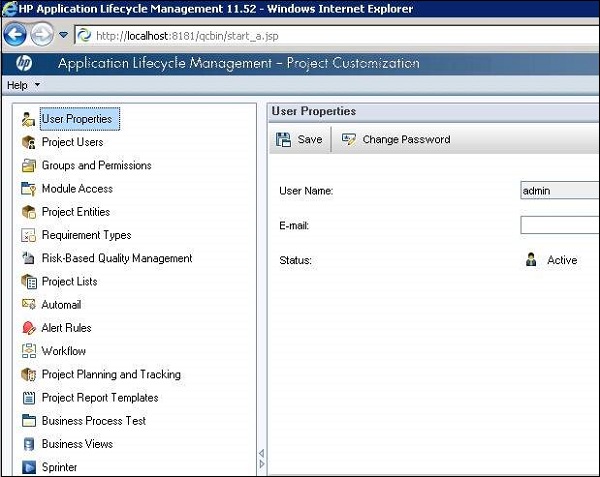
Quality Center - Project Customization
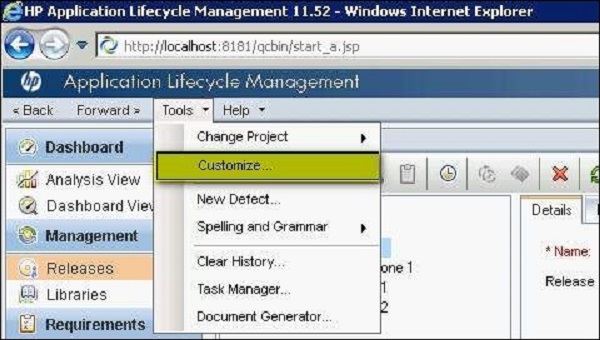
Sometimes we are in a situation to customize the project. Below are the modules which will help us in customizing the project. Click on each one of these links to understand the functionalities in detail. Project Customization module can be accessed by navigating to "tools" >> "Customize" as shown below −
When a project administrator accesses project Customization, then the following modules would be shown to the user for customization.
| S.No. | Functionality & Description |
|---|---|
| 1 | User Properties
Helps user to update profile details.
|
| 2 | Project Users
Add/Remove user and user roles.
|
| 3 | Groups and Permissions
Add/Remove group previleges.
|
| 4 | Module Access
Edit Module Level Access.
|
| 5 | Project Entities
Add/Edit/Delete Project Fields
|
| 6 | Requirement Type
Create,Edit,delete requirement Type
|
| 7 | Project Lists
Add,Edit,Delete all project list box fields.
|
| 8 | Automail
Send mail based on specific settings.
|
| 9 | Alert Rules
Alert users based on specific changes.
|
| 10 | WorkFlow
Defect Fields Customization.
|


Comments
Post a Comment